

Edit Replication Processes
You can view and change the configuration of a Capture or an Apply Process at any time, while the process is stopped or running. The changes are stored with the “Save Process” button and are used when the process is run: for a running process Repstance offers to restart it (see “Save the changes” at the end of this page). The same changes can be made with the “alter” command of repcli and the REST API (see Alter Process).
Capture Process Configuration
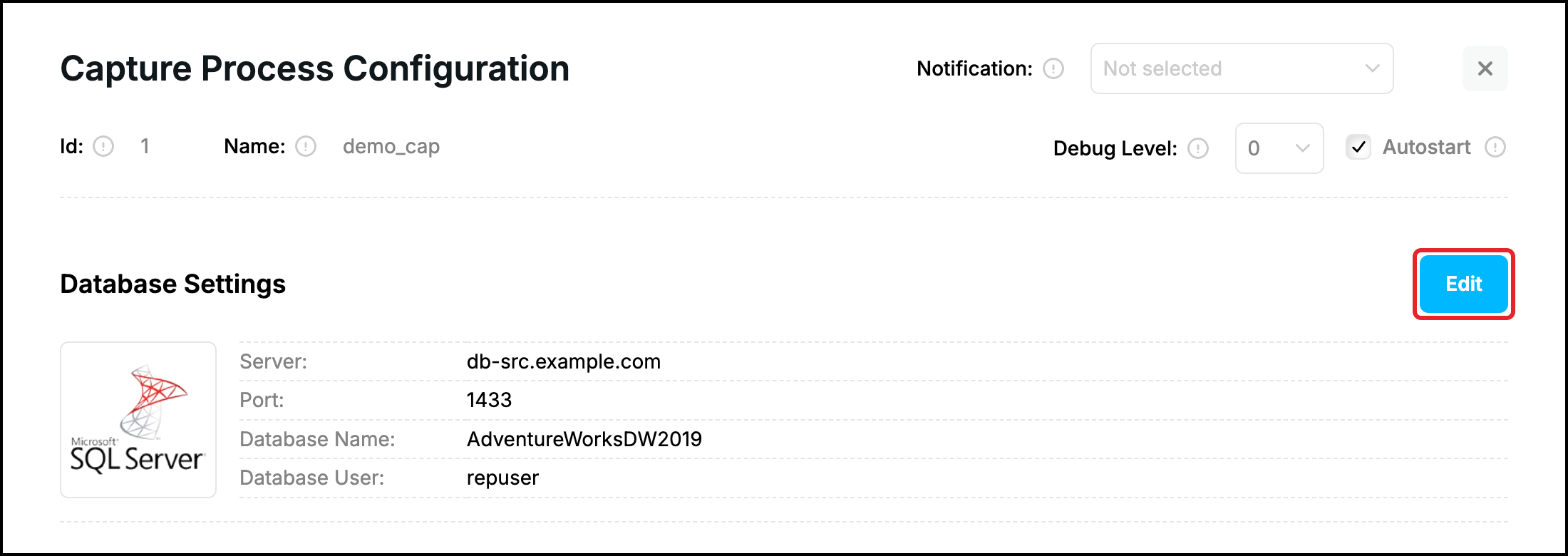
To view or change Capture process configuration click “Edit” button of that process:

The upper part of the form contains the general settings of the process. “Id” and “Name” are shown for information and cannot be changed. “Notification” selects the notification channels which are informed when the process has failed and can not be restarted automatically (see Monitoring Replication). “Debug Level” (0 to 15) defines how many details are written to the log of the process, the default value is 0. “Autostart” runs the process automatically when it is created and every time the Repstance server starts (see Stop/Run Replication Processes). Click the “i” icon next to a field to see its short description.
Click “Edit” button of the “Database Settings” section if you wish to modify database configuration. Change the settings in the “Database Settings” window, use “Test connection” to check them and click “Save” (see Setup First Replication for the details). The password is shown as dots, leave it as it is to keep the current password. “Save” in this window only returns you to the process form: the new settings are stored when you click “Save Process”:
You can modify replication objects and transformation rules in the “Replication Object Settings” section by using “Replication Object Wizard” or directly editing DML, DDL and Load rules:
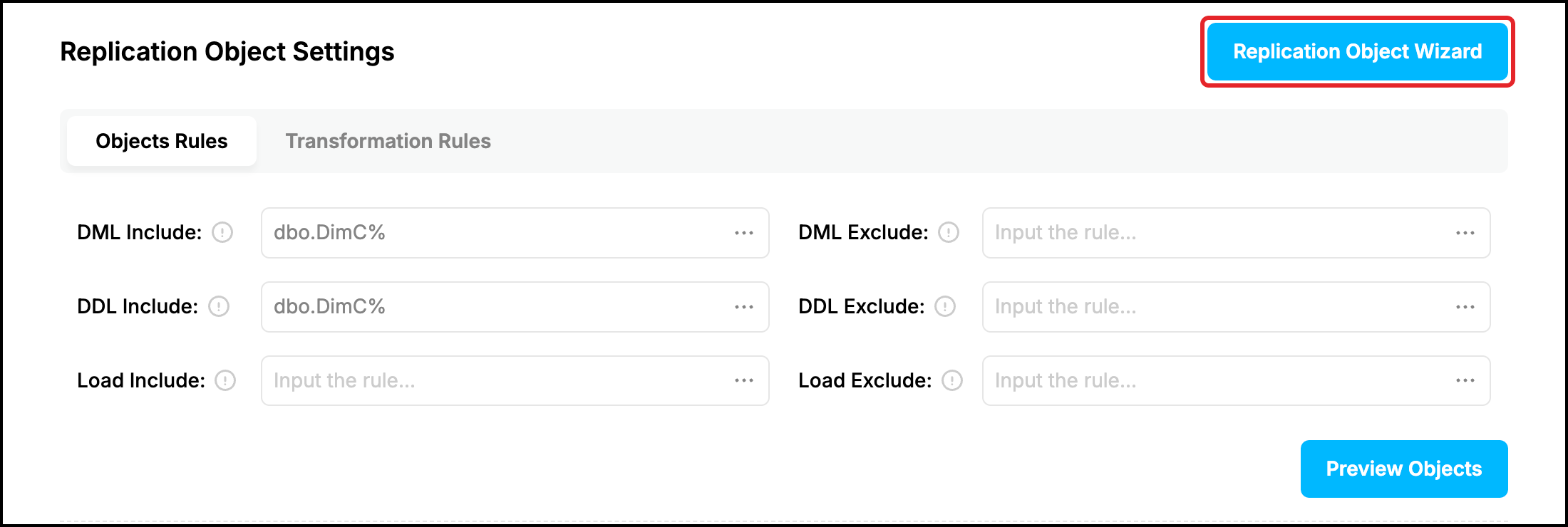
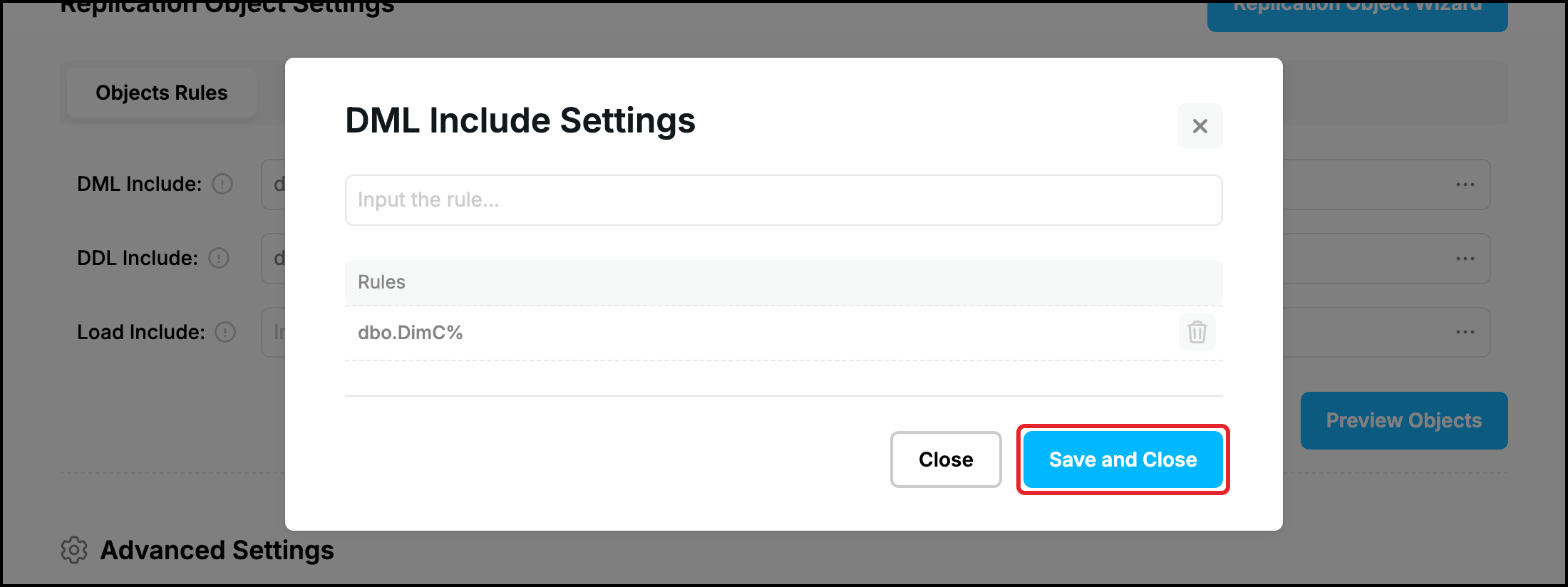
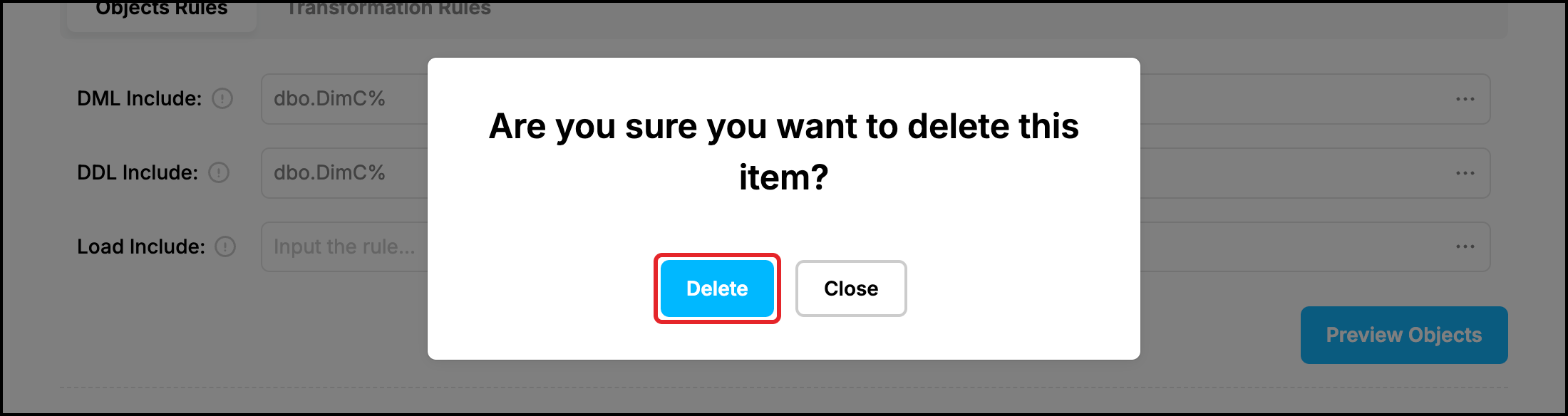
Every rule is a list of tables in the schema_name.table_name format, the % symbol matches any number of characters (see Capture Objects Specification). The tables of “DML Include” are replicated, “DML Exclude” removes tables from it, “DDL Include” and “DDL Exclude” do the same for the DDL statements, an exclude rule wins over an include rule. “Load Include” lists the tables whose existing data is copied before the replication starts (Initial Load) and “Load Exclude” the tables which must not be copied. Click the three dots (“…”) next to a rule to edit its list: type a rule and press Enter to add it, use the trash icon to remove a rule and click “Save and Close”:
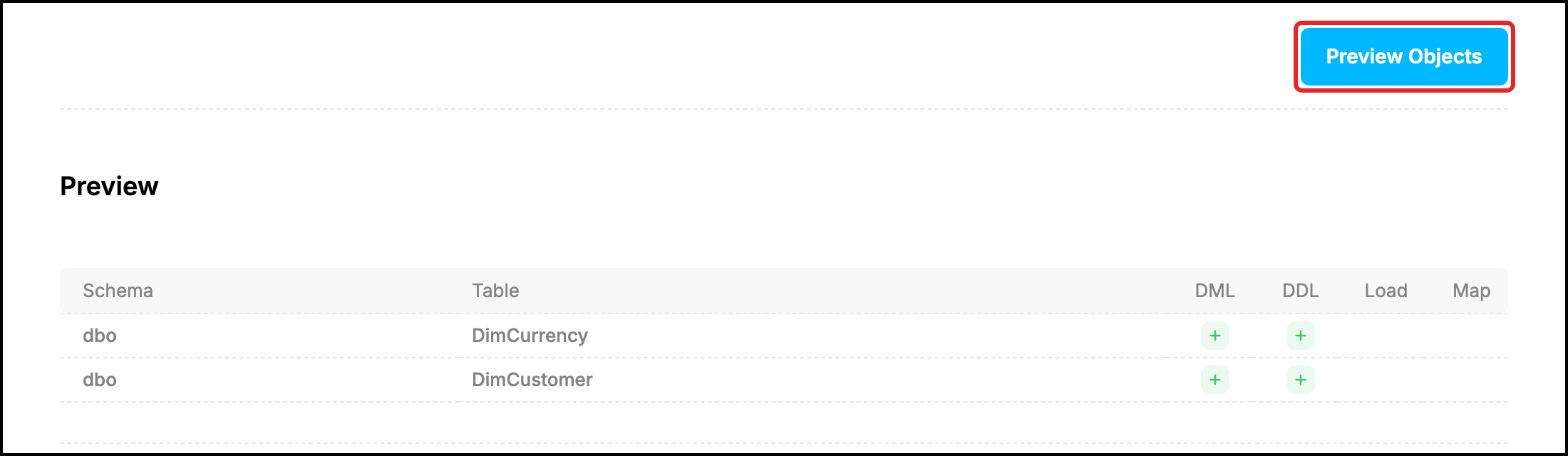
Once the changes are made click “Preview Objects” to see the objects included in the replication. The “DML”, “DDL” and “Load” columns show for which of them a table is included, the “Map” column shows the tables with a transformation rule:
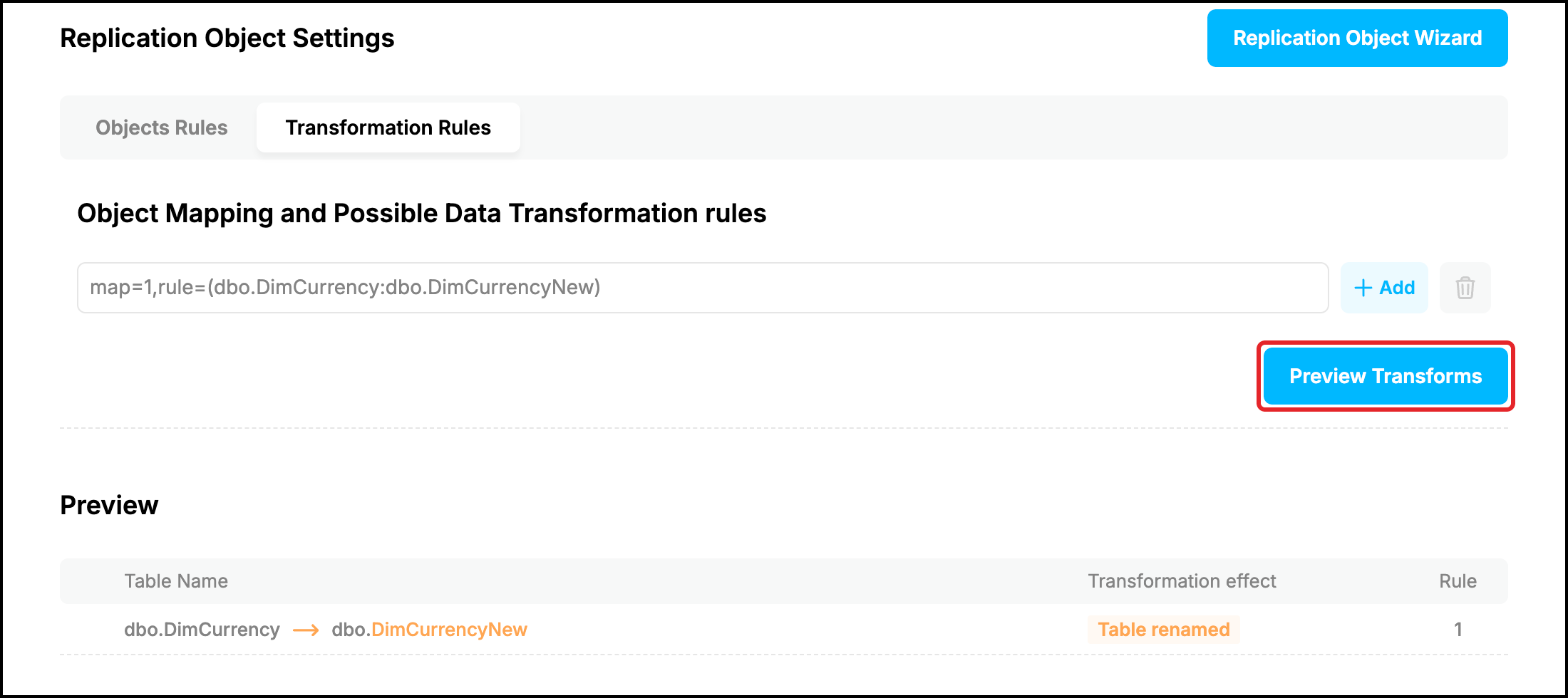
The “Transformation Rules” tab holds the transformation rules of the Capture Process, they are applied for all the Apply Processes of this Capture Process (see Objects Mapping and Transformation Rules). Type a rule, for example map=1,rule=(dbo.DimCurrency:dbo.DimCurrencyNew), or generate it with the “Replication Object Wizard”, and click “Add” to enter one more rule. Click “Preview Transforms” to get details on the objects' transformations: for every table the preview shows its new name, the effect of the rule (here “Table renamed”) and the number of the rule:
Advanced Settings
The form shows the most often used settings. All the other parameters of a Capture or an Apply Process (see SQL Server Capture Process Parameters or Oracle Capture Process Parameters for the Capture Process and the page of the Target Database, for example SQL Server Apply Process Parameters, for the Apply Process) are set in the “Advanced Settings” section at the bottom of the form:
- Type the name of the parameter in the “Parameter Name” field and its value in the “Value” field. The name is not case-sensitive.
- Click “Add” if you need one more parameter, a new pair of fields appears. The rows with an empty name or an empty value are ignored.
- Click “Save Process”.

The parameters which are set for the process but are not on the form are listed in this section every time you open the form, so you can see and edit them. The picture shows the parameter “restartattempts” with the value 5: it is the number of the automatic restarts of a failed process, the Capture form has no field for it (the Apply form has, see below). To return a parameter to its default value click the trash icon next to it, confirm with “Delete” and click “Save Process”:
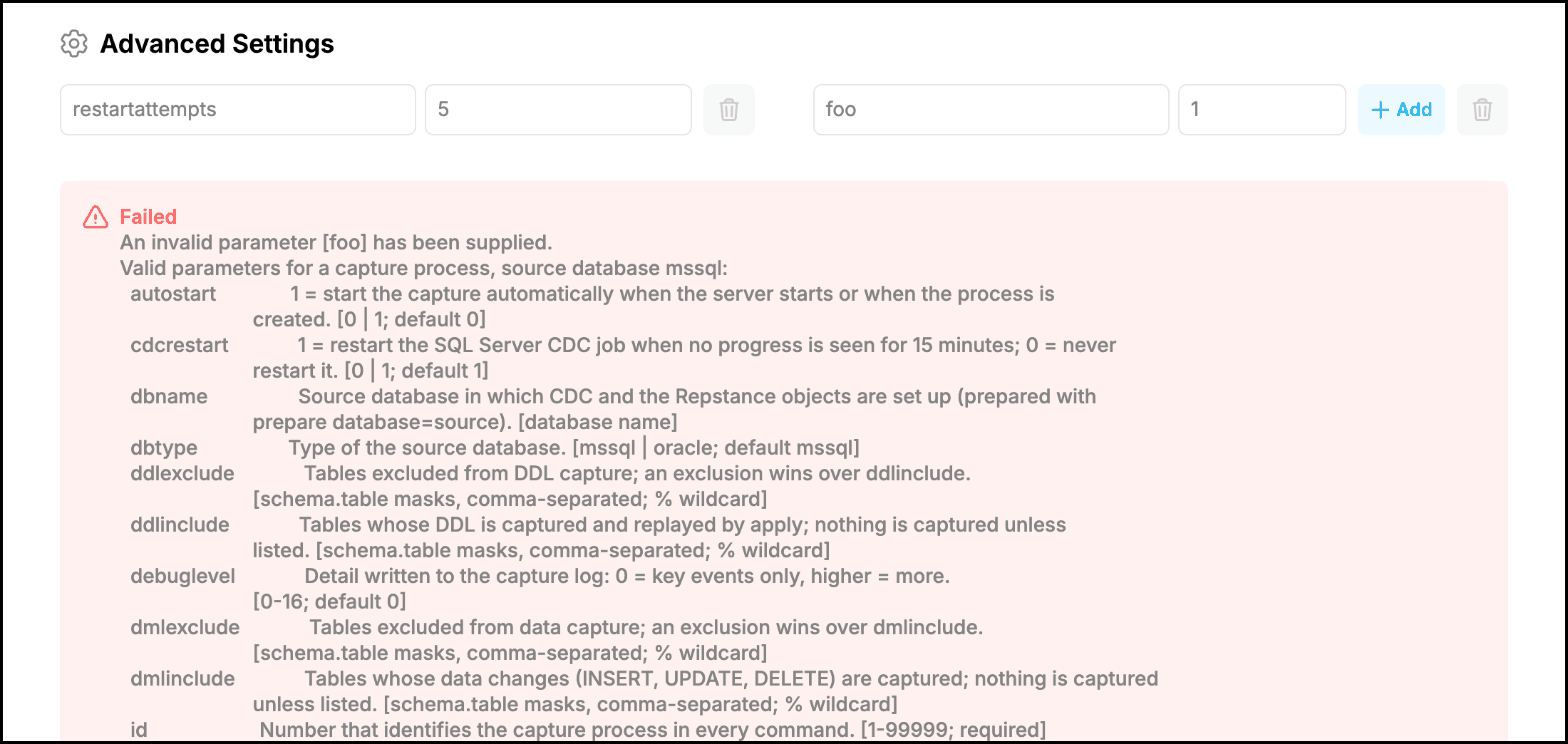
If a name or a value of a parameter is not valid, nothing is saved. The form shows the message “Failed” with the invalid parameter and the list of all the valid parameters of this process with their descriptions, accepted values and default values. Correct the parameter and click “Save Process” again:
Apply Process Configuration
The modification of the Apply process is similar to Capture modification. Click “Edit” button of the Apply process:

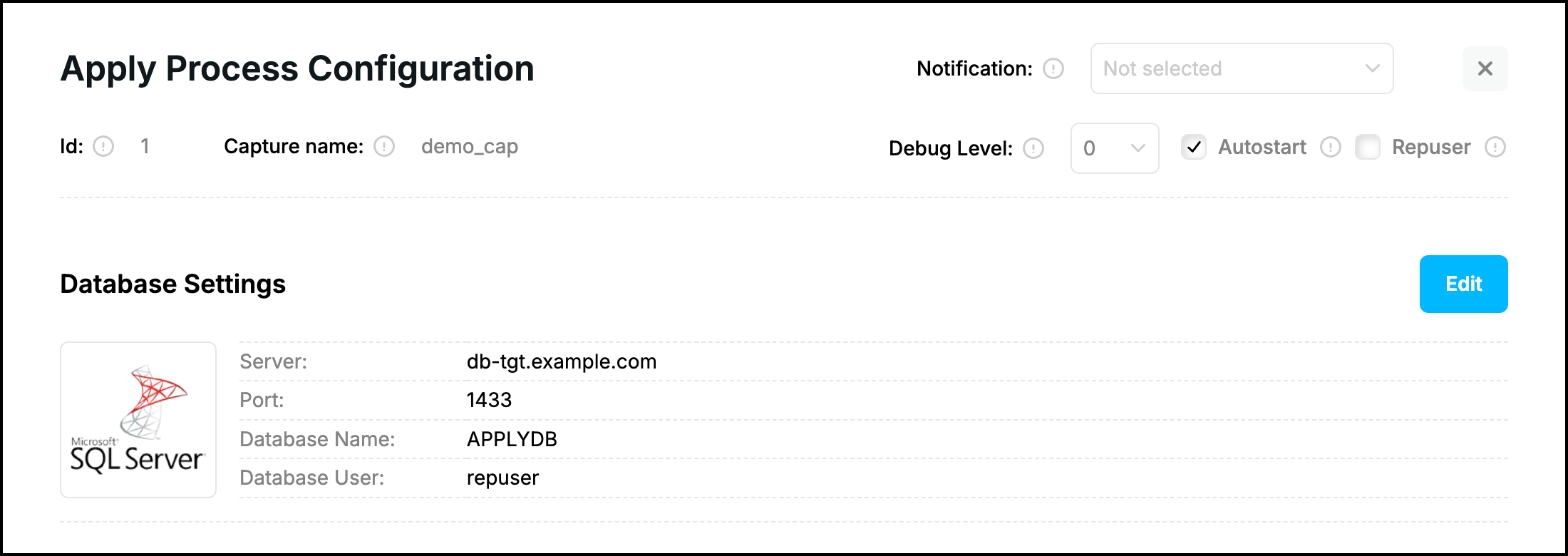
The form has the same structure. “Capture name” shows the Capture Process which provides the data, it cannot be changed. Beside “Notification”, “Debug Level” and “Autostart” the form has the “Repuser” check box: if it is enabled, the Apply Process represents itself as a SQL Server replication process, so the changes of the objects marked “Not for Replication” (identity columns, triggers, foreign keys and check constraints) are handled in the same way as a SQL Server replication agent would do, for example such triggers are not fired. The database connection is changed with “Edit” in “Database Settings”, as for the Capture Process:
The “Replication Object Settings” section of the Apply form has three tabs. The “Process Parameters” tab contains the settings of the process (see SQL Server Apply Process Parameters for the details), leave a field at “Default” or empty to use its default value:
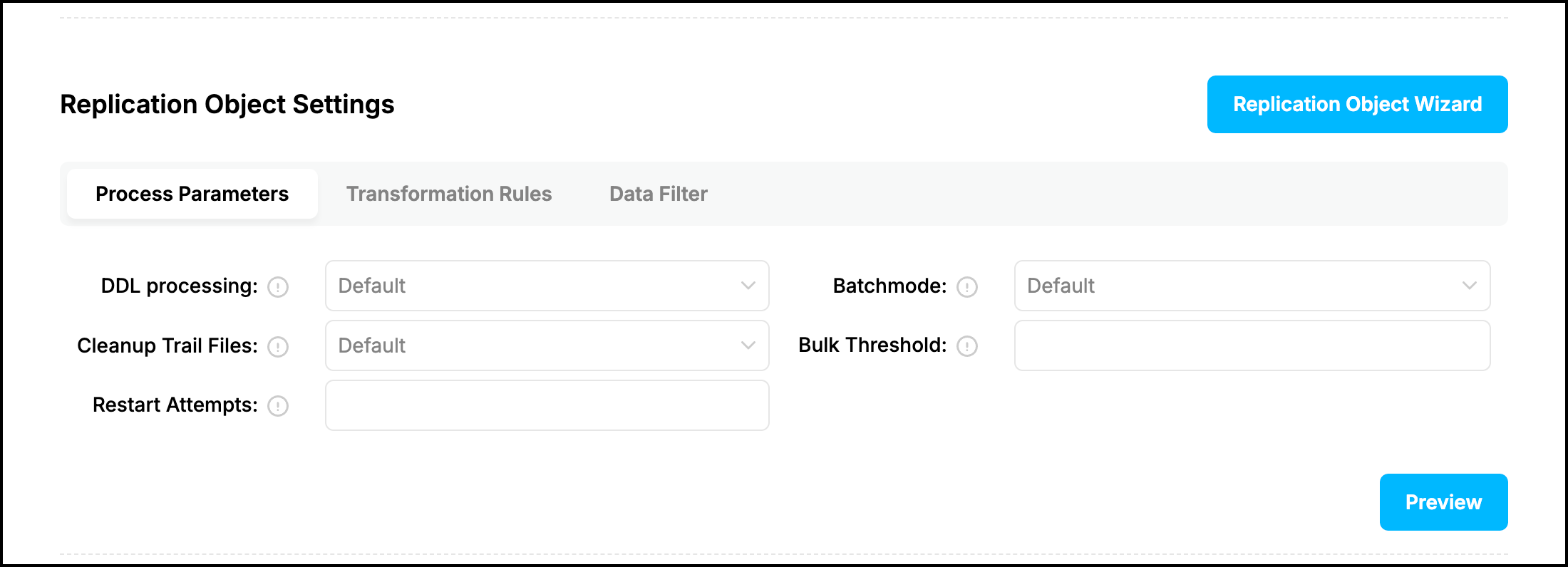
- DDL processing – how the DDL statements are applied. “Native” (the default) runs the statement as it was written in the Source Database, “Dictionary” generates the statement from the dictionary changes (heterogeneous replication) and “Map” generates it from the dictionary and the transformation rules.
- Cleanup Trail Files – how long the Apply Process keeps the trail files after it has applied them: “Cleanup After Processing” deletes them at once (the default), “Never Cleanup” keeps them and “Days” keeps them for the number of days entered in the field next to the list (see Housekeeping). An incremental data comparison reads the changes from the trail files and fails if they have been deleted, so choose “Never Cleanup” or “Days” with more days than pass between two comparisons (see Tasks Control).
- Restart Attempts – the number of the automatic restarts of a failed process, the default value is 5 and 0 disables the restart (see Stop/Run Replication Processes).
- Batchmode – optimizes the apply operations. “Disabled” applies the changes in the transactions as they occurred in the Source Database, “Single Transaction” combines a set of the transactions into one transaction and “Net Changes” also reduces the changes of every row to one net change (this requires all the foreign keys of the Target Database to be disabled).
- Bulk Threshold – the minimum number of the consecutive changes of one table and one operation within a transaction, for which the Apply Process loads the rows in bulk instead of applying them one by one. The default value is 1000, 0 disables the bulk loading.
To keep the trail files for a number of days select “Days” and enter the number:

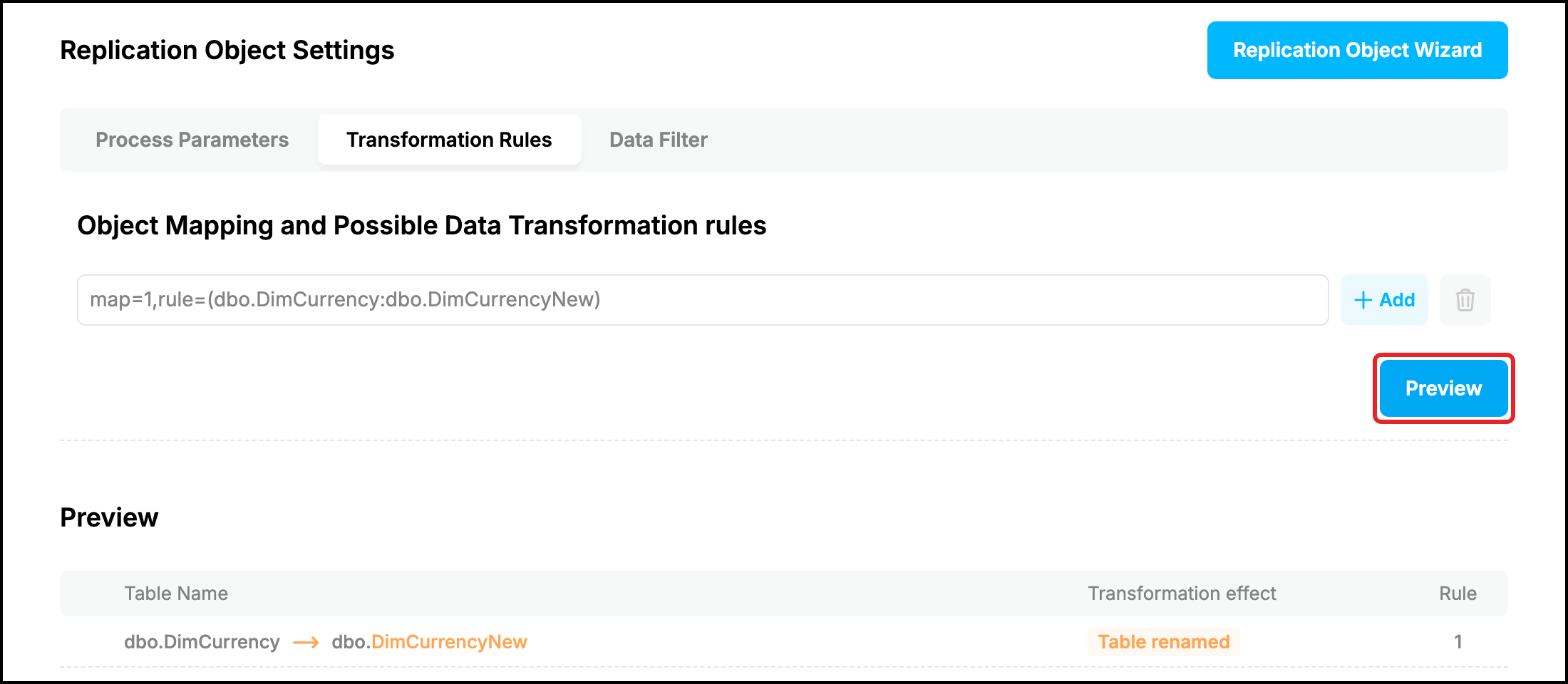
The “Transformation Rules” tab contains the transformation rules of this Apply Process only, the rules of its Capture Process are applied as well. A rule is entered as in the Capture form, click “Preview” to see its effect:
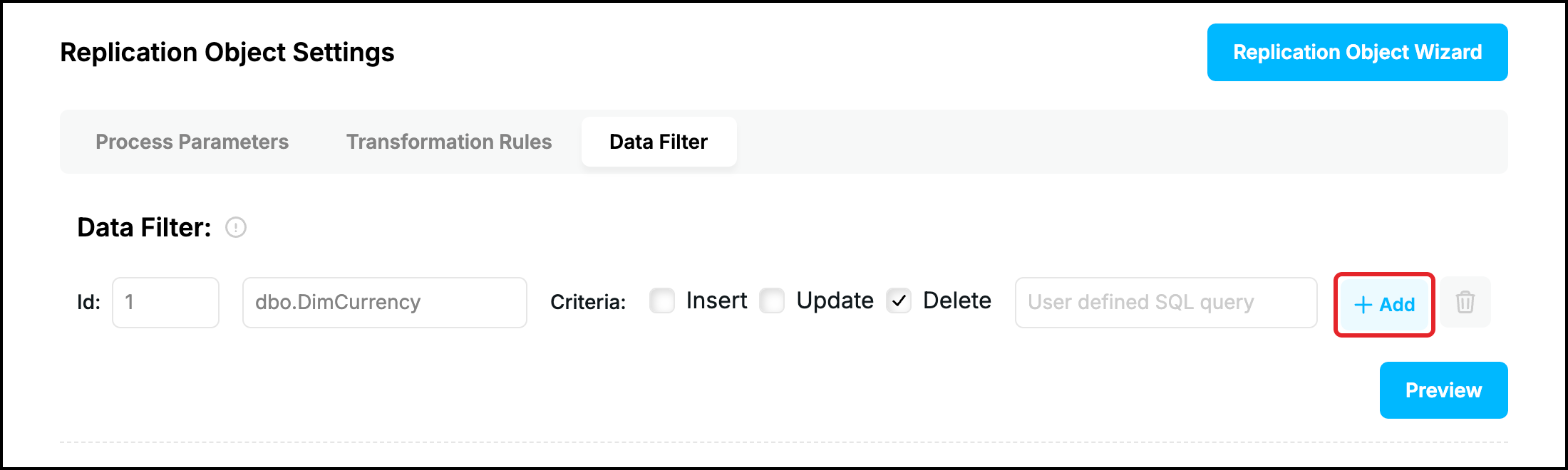
The “Data Filter” tab lets the Apply Process skip some of the DML operations (see Filter Data in the Apply Process). Enter an “Id” (the filters are used in the order of their ids), the “Table name” in the schema_name.table_name format (the % symbol is allowed) and select the “Criteria”: the operations (Insert, Update, Delete) the filter is defined for. In “User defined SQL query” enter a condition: the operation is skipped for the rows which satisfy it, if the condition is empty the operation is skipped for all the rows of the table. The filter in the picture makes the Apply Process ignore all the DELETE operations of the dbo.DimCurrency table. Click “Add” to define one more filter:
“Preview” lists the tables which the Apply Process applies, with the transformations. The parameters which are not on the form, for example “ldtxsize” (the number of the rows inserted in one transaction at the Initial Load stage) or “mergetables”, are set in “Advanced Settings” in the same way as for the Capture Process.
Validate the process
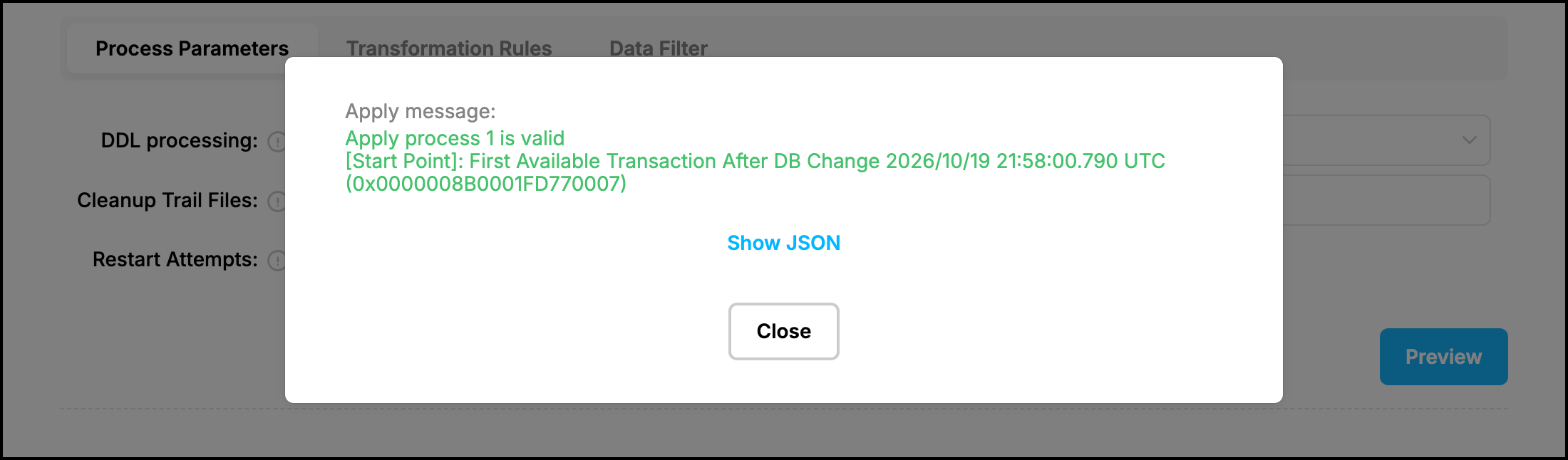
Click “Validate” at the bottom of the form to check the process (see Validate Process). The message tells that the process is valid or what is wrong, and shows useful information, for example the last captured position and the trail file of a Capture Process or the start point of an Apply Process. “Validate” checks the process as it is stored, so save your changes first:
Save the changes
Once all the modifications are done click “Save Process” button to apply these changes. “Close” closes the form without saving the changes, “Delete” (it is available for a stopped process only) removes the process (see Remove Replication Configuration).

If the process is stopped, the new configuration is used the next time you run the process. If the process is running, it keeps working with the old configuration and Repstance asks if the process must be restarted: “Restart Now” stops the process and starts it again with the new configuration, “Restart Later” leaves the process running and the new configuration is used after the process is stopped and run again (see Stop/Run Replication Processes). The new replication objects and transformation rules are put into effect when the process is run (see Run any Capture or Apply Processes):

Prev page:
Stop/Run Replication ProcessesNext page:
Remove Replication Configuration- Repstance User Guide
- ABOUT REPSTANCE
- SUPPORTED DATABASE REQUIREMENTS
- GETTING STARTED WITH REPSTANCE
- INTERACTING WITH REPSTANCE SERVER
- CONFIGURE REPLICATION WITH REPSTANCE
- DATABASE CONFIGURATION COMMANDS
- PROCESS CONFIGURATION COMMANDS
- PROCESS CONTROL COMMANDS
- DATA COMPARISON
- REPSTANCE SERVER MAINTENANCE
- MONITORING WITH AMAZON CLOUDWATCH
- MONITORING WITH AZURE MONITOR
- TROUBLESHOOTING AND FAQ
- GLOSSARY