Setup First Replication
When you log into the Repstance Web UI for the first time you will see this screen:

Click “Create new process” button to proceed with Capture configuration(see Prepare Capture Process for more details):
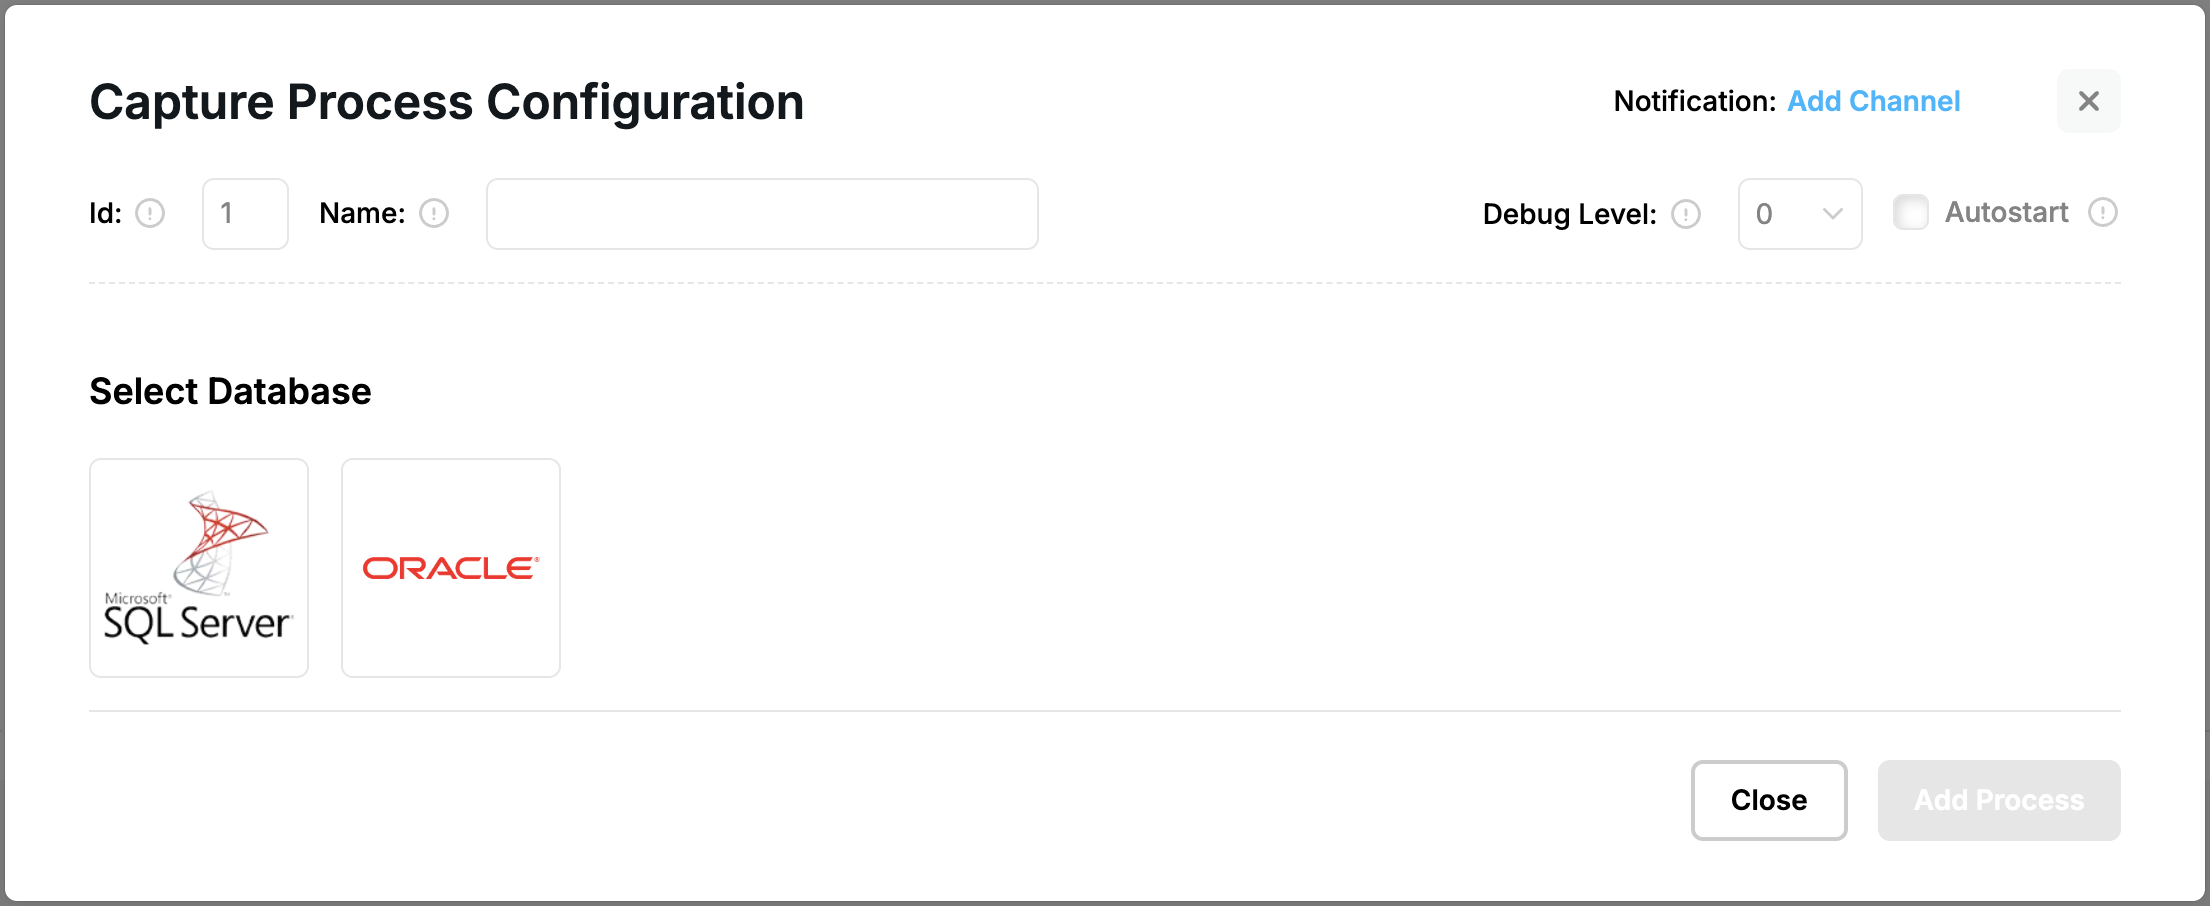
Provide Capture process Id, Capture process name, and click database logo. It will open Source database connection form:
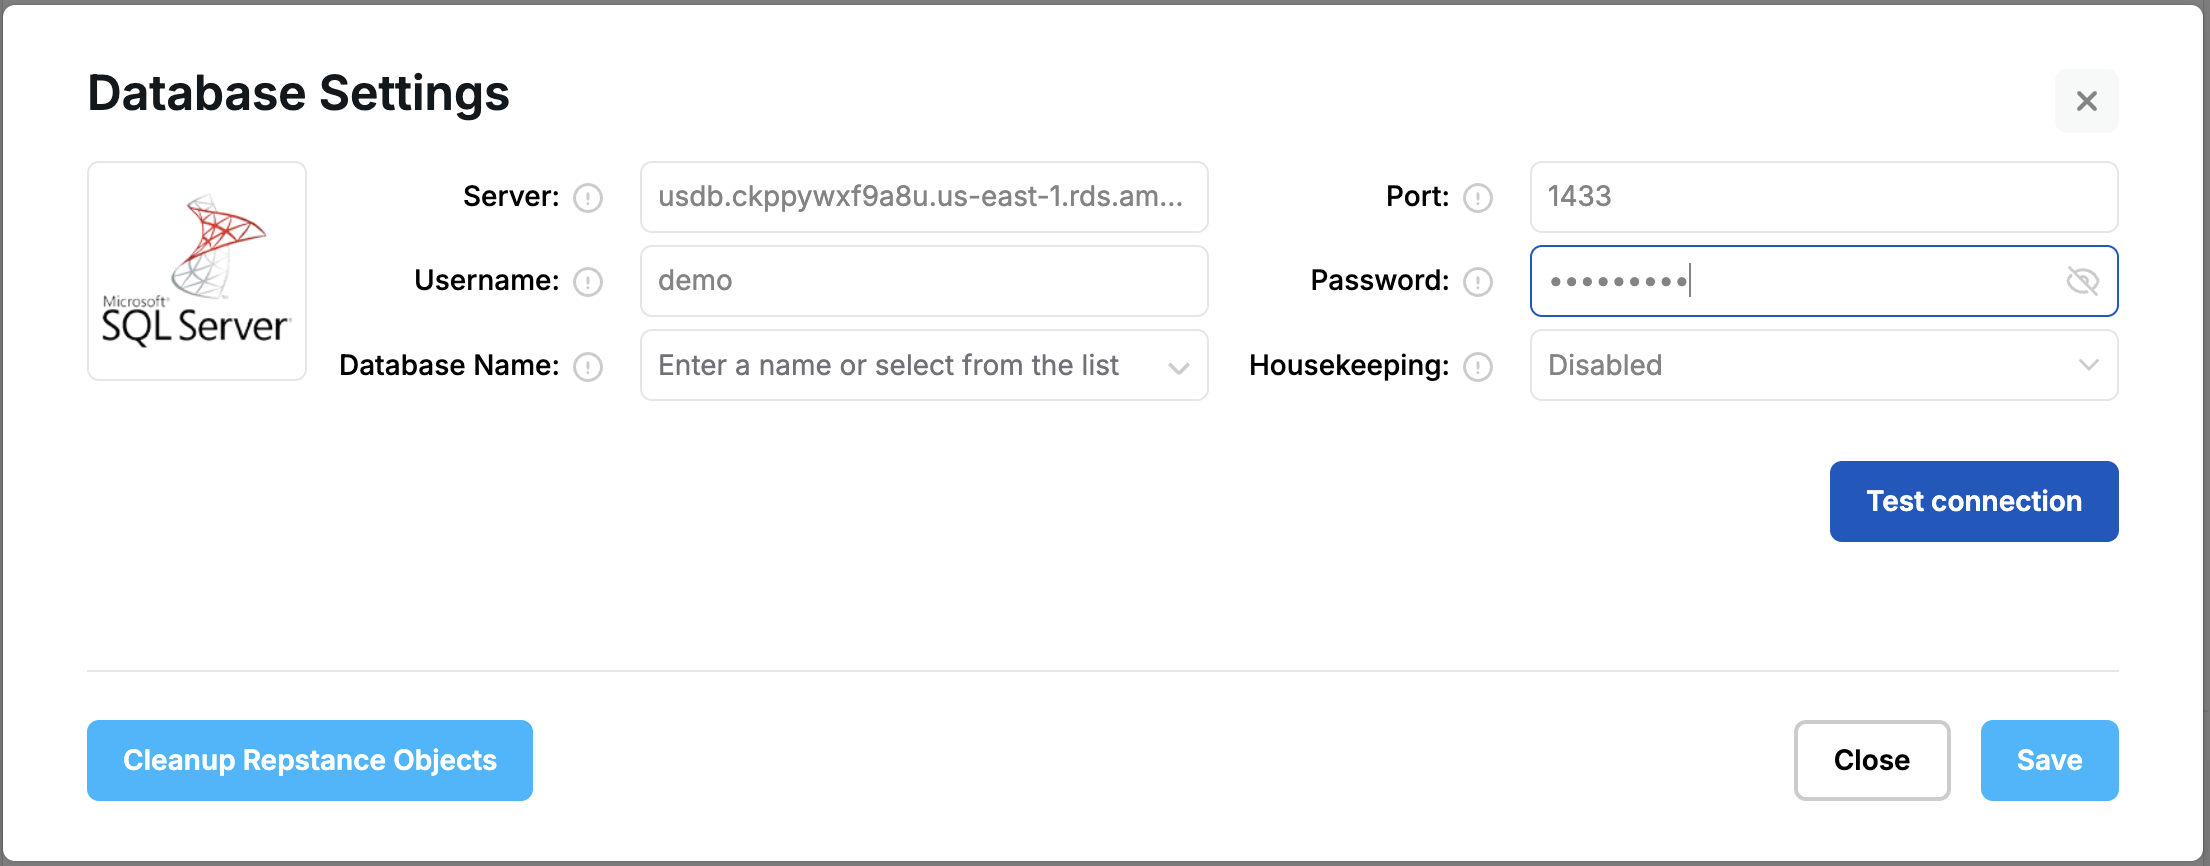
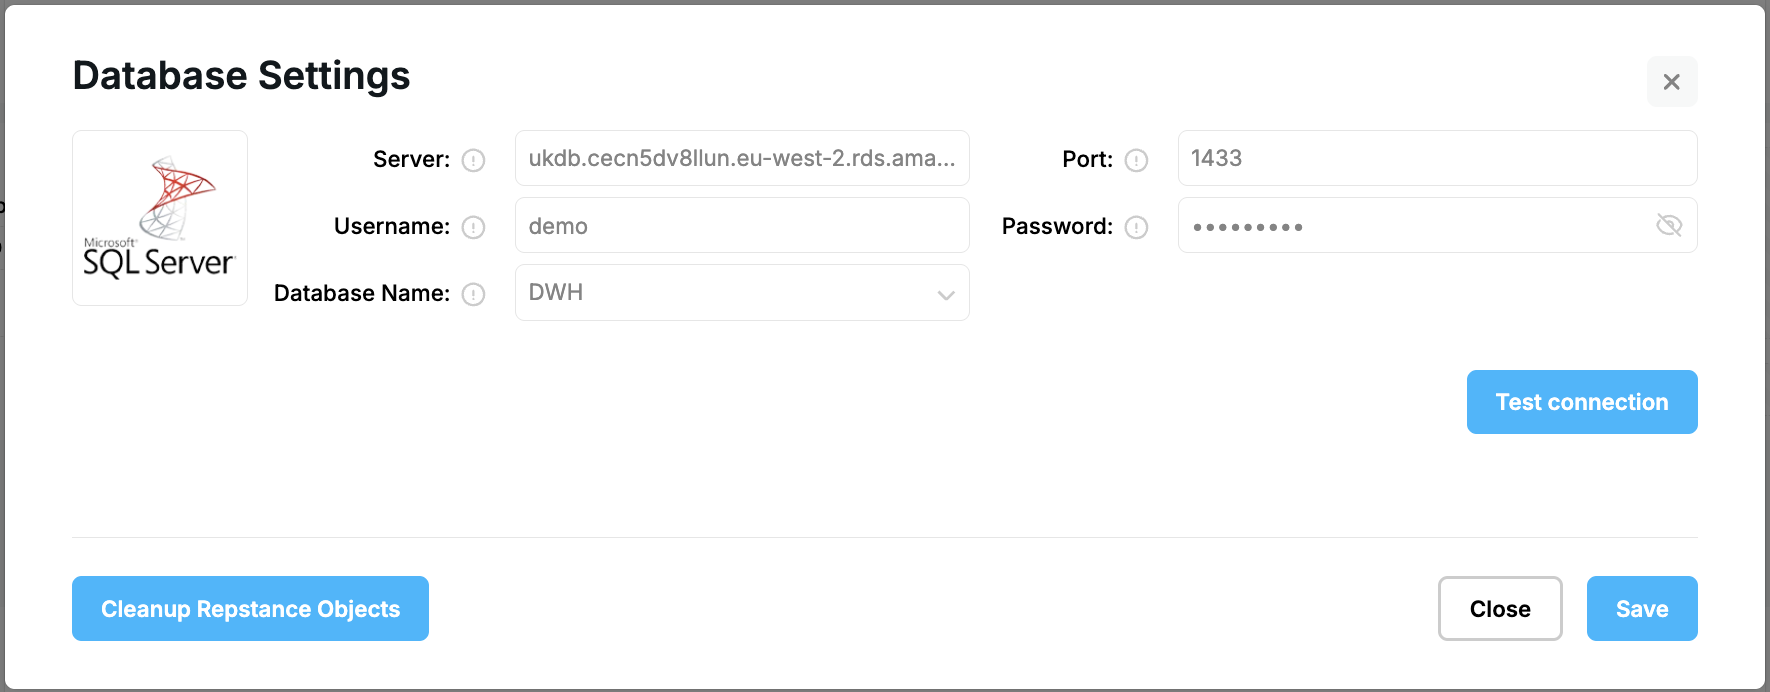
Provide the Database connectivity settings (host, port, username, password, etc). Click “Test connection” to verify the Source database. Depending on the selected RDMBS type the various types of parameters are to be provided (see SQL Server Capture Parameters and Oracle Capture Parameters for the details) :
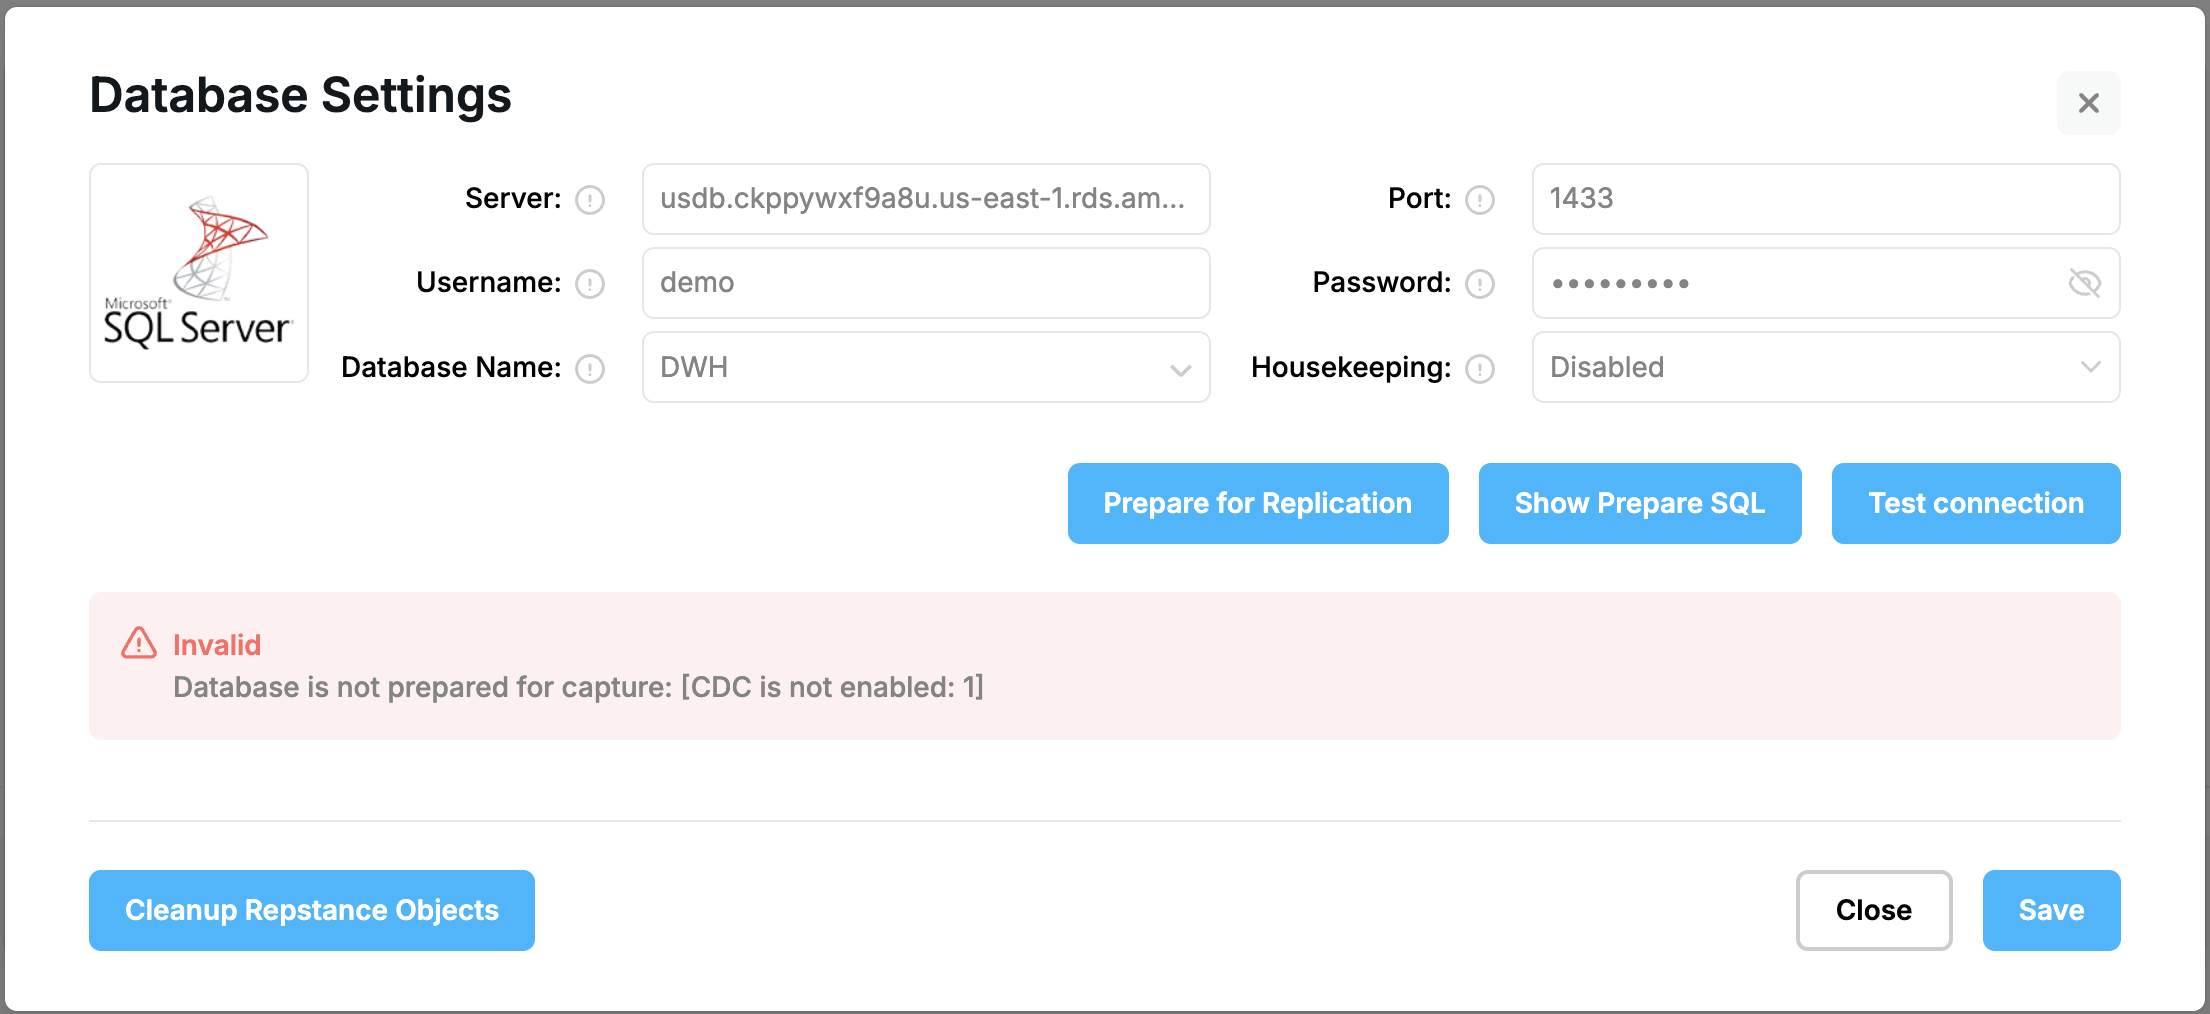
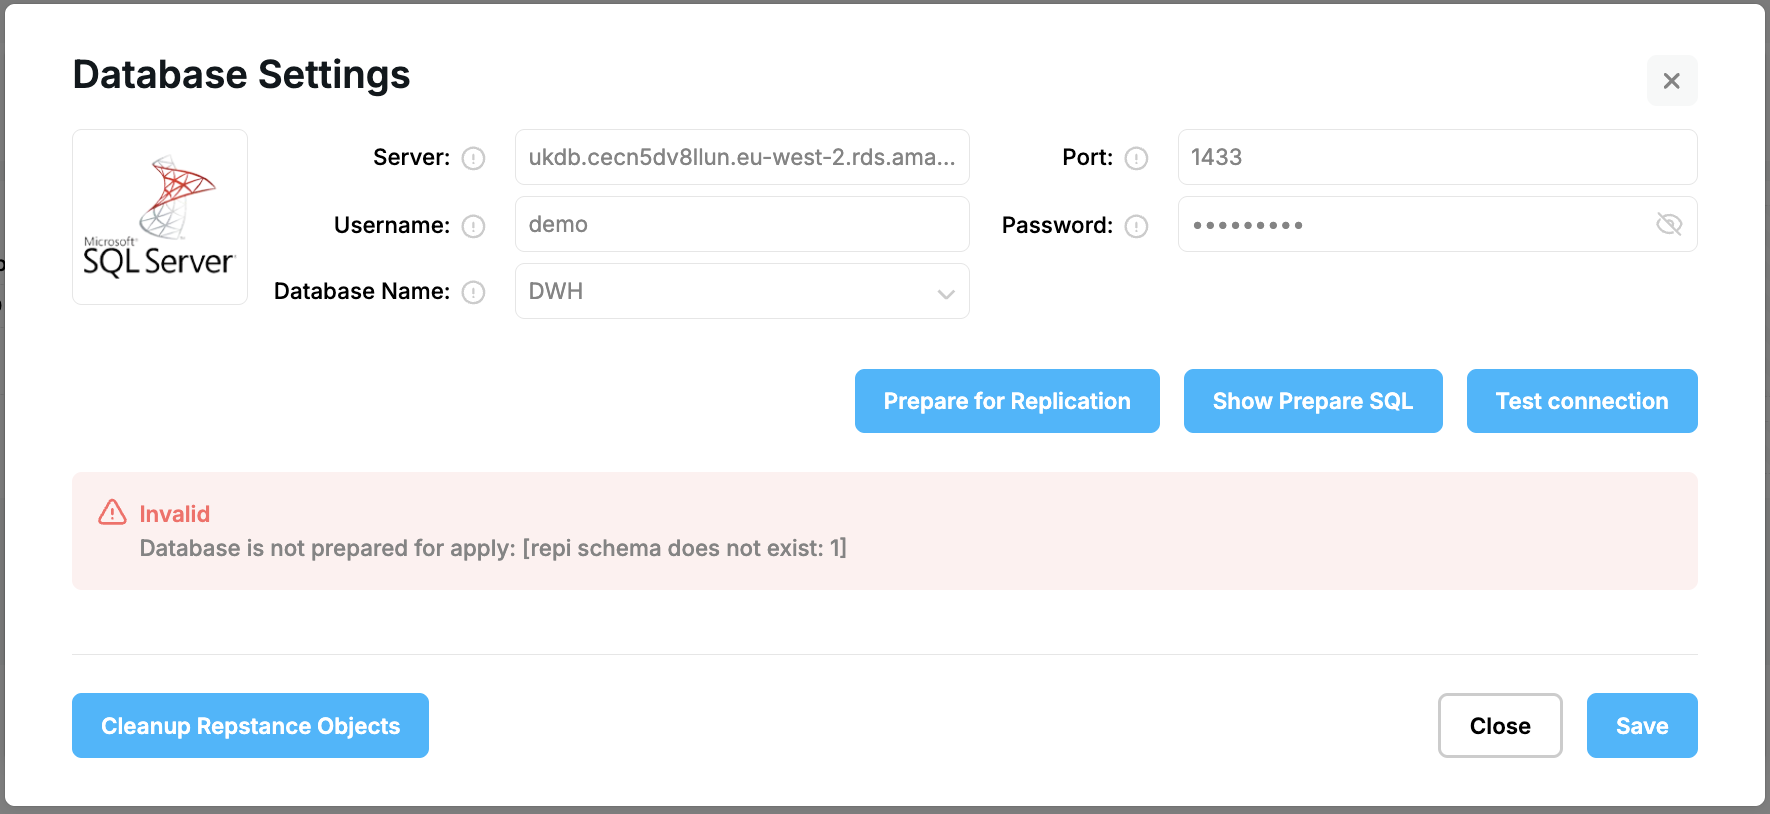
If the Source database is not ready for replication, you'll see an error message. Click “Prepare for Replication” to install all the necessary Repstance's objects:
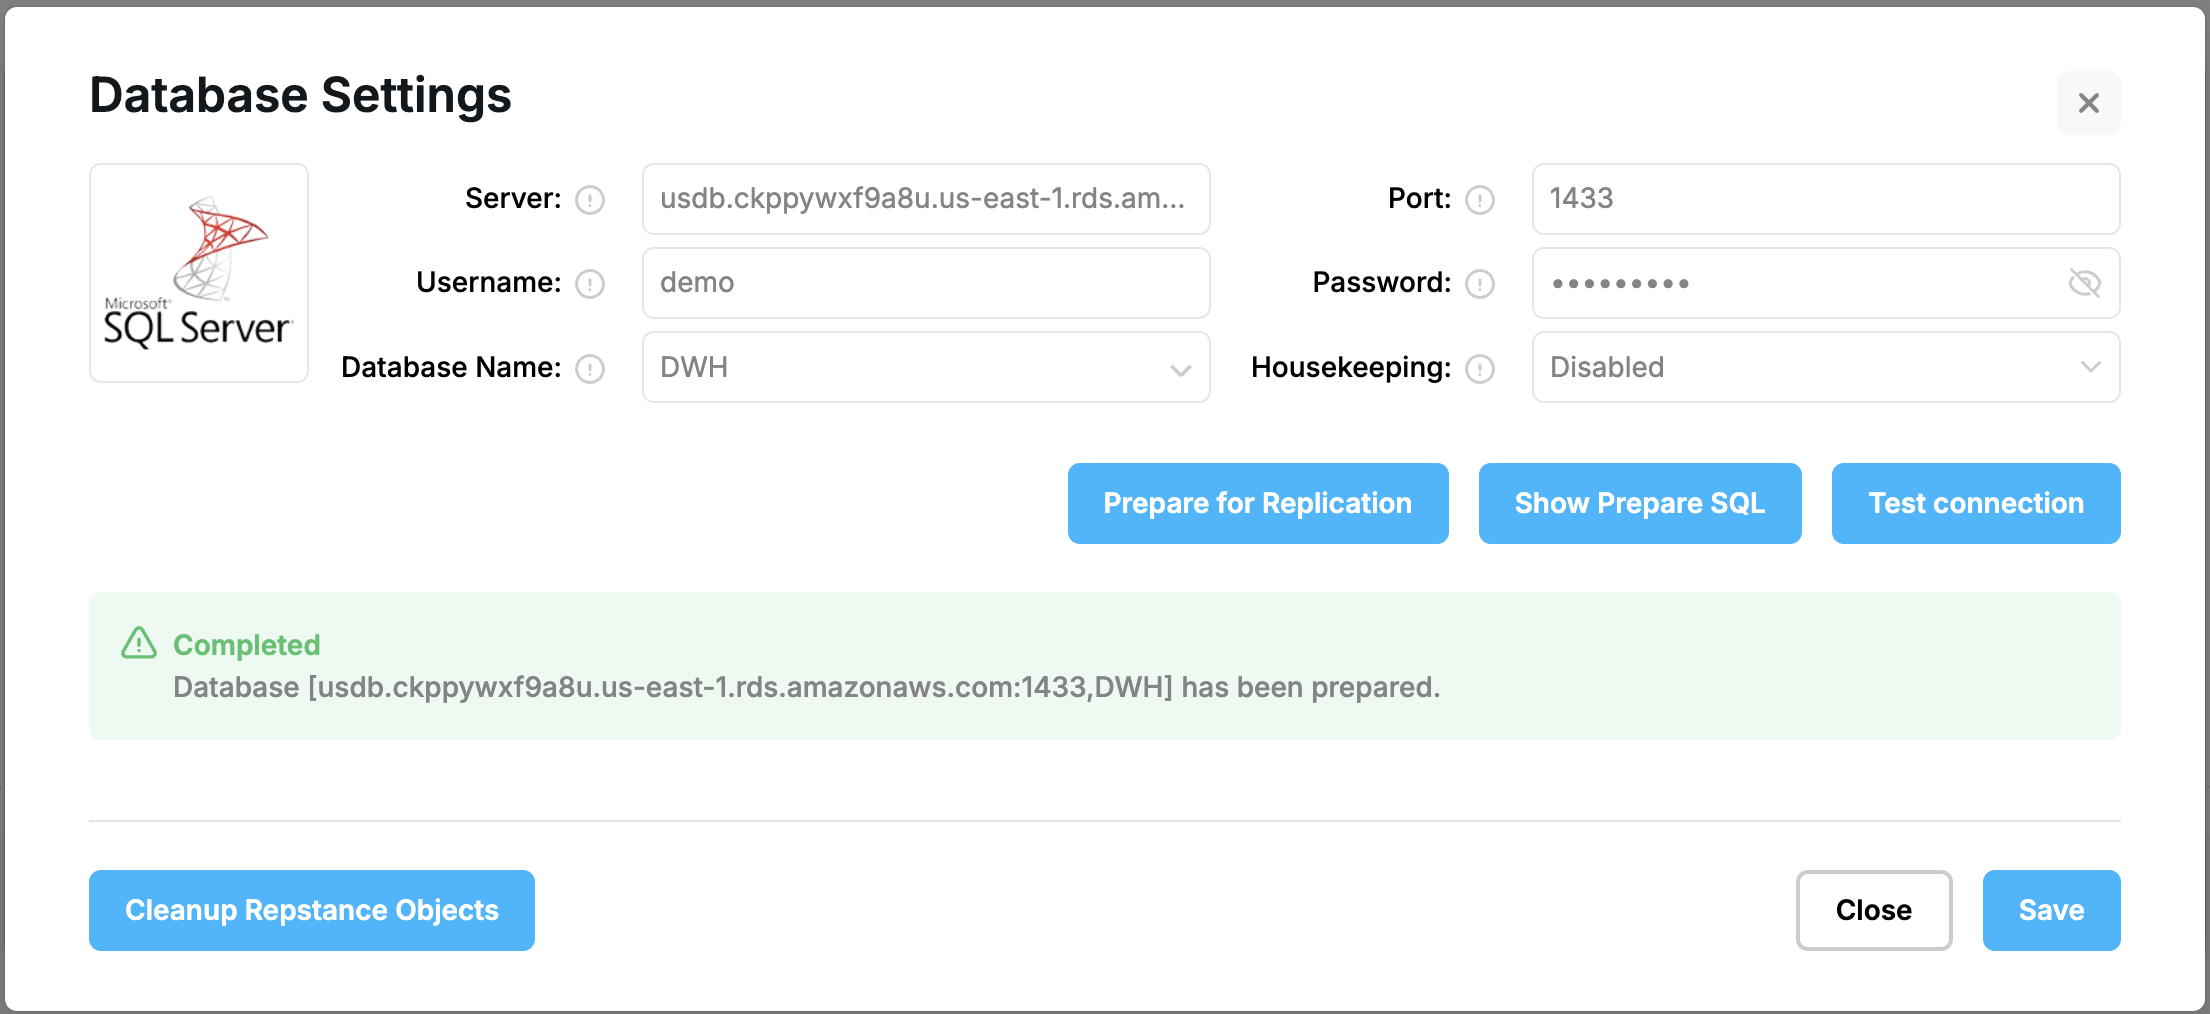
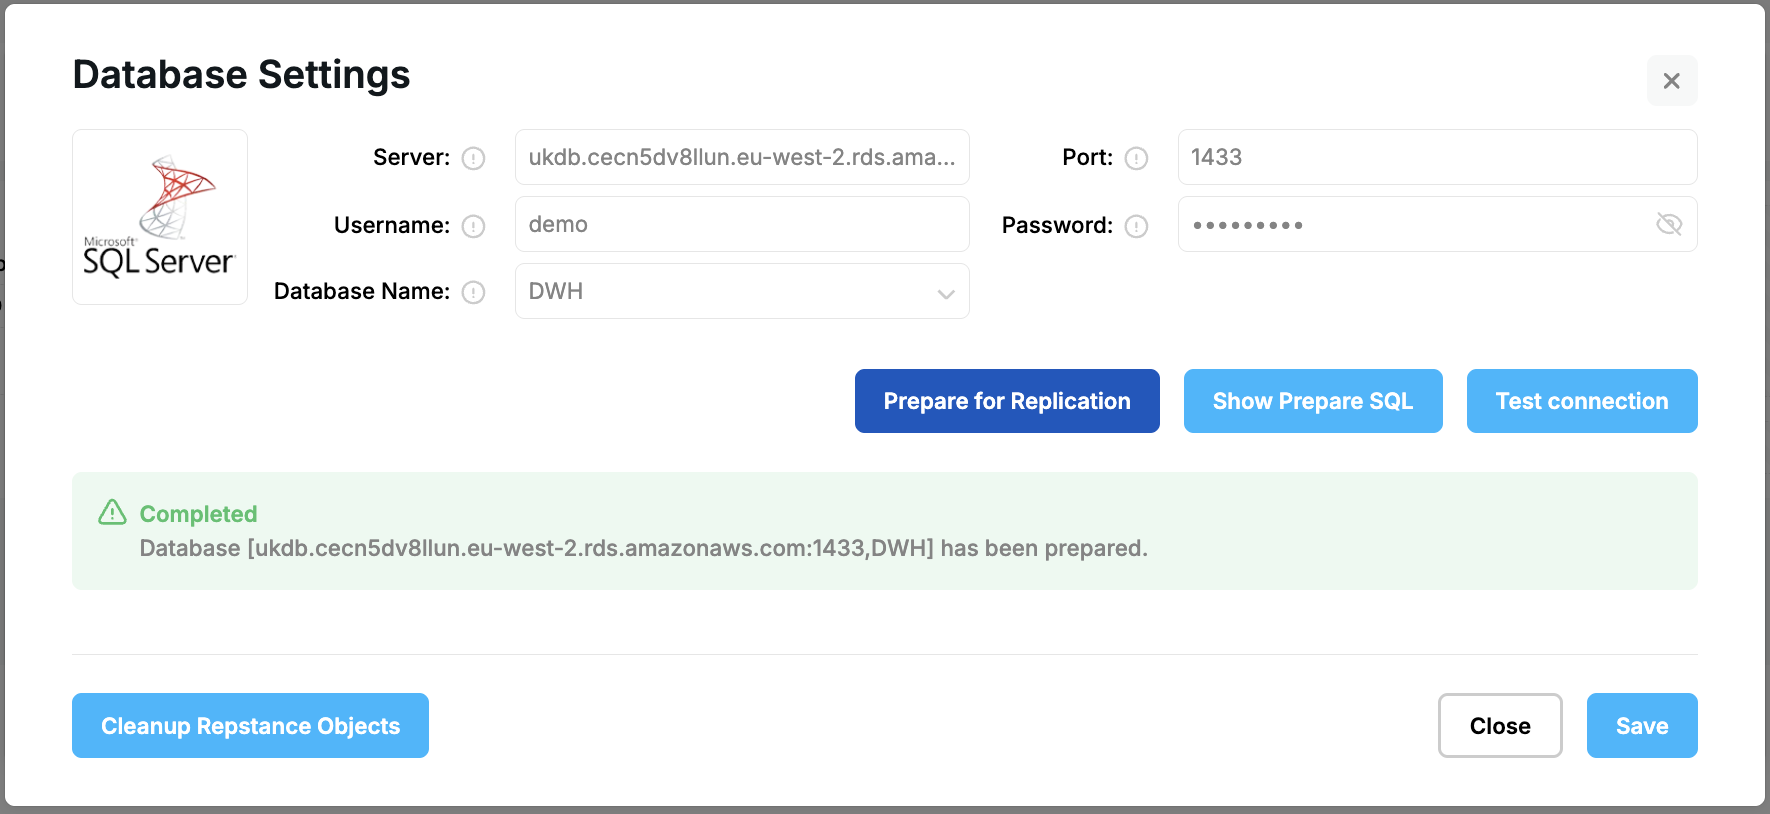
Click “Test connection” again to ensure that database is ready now:

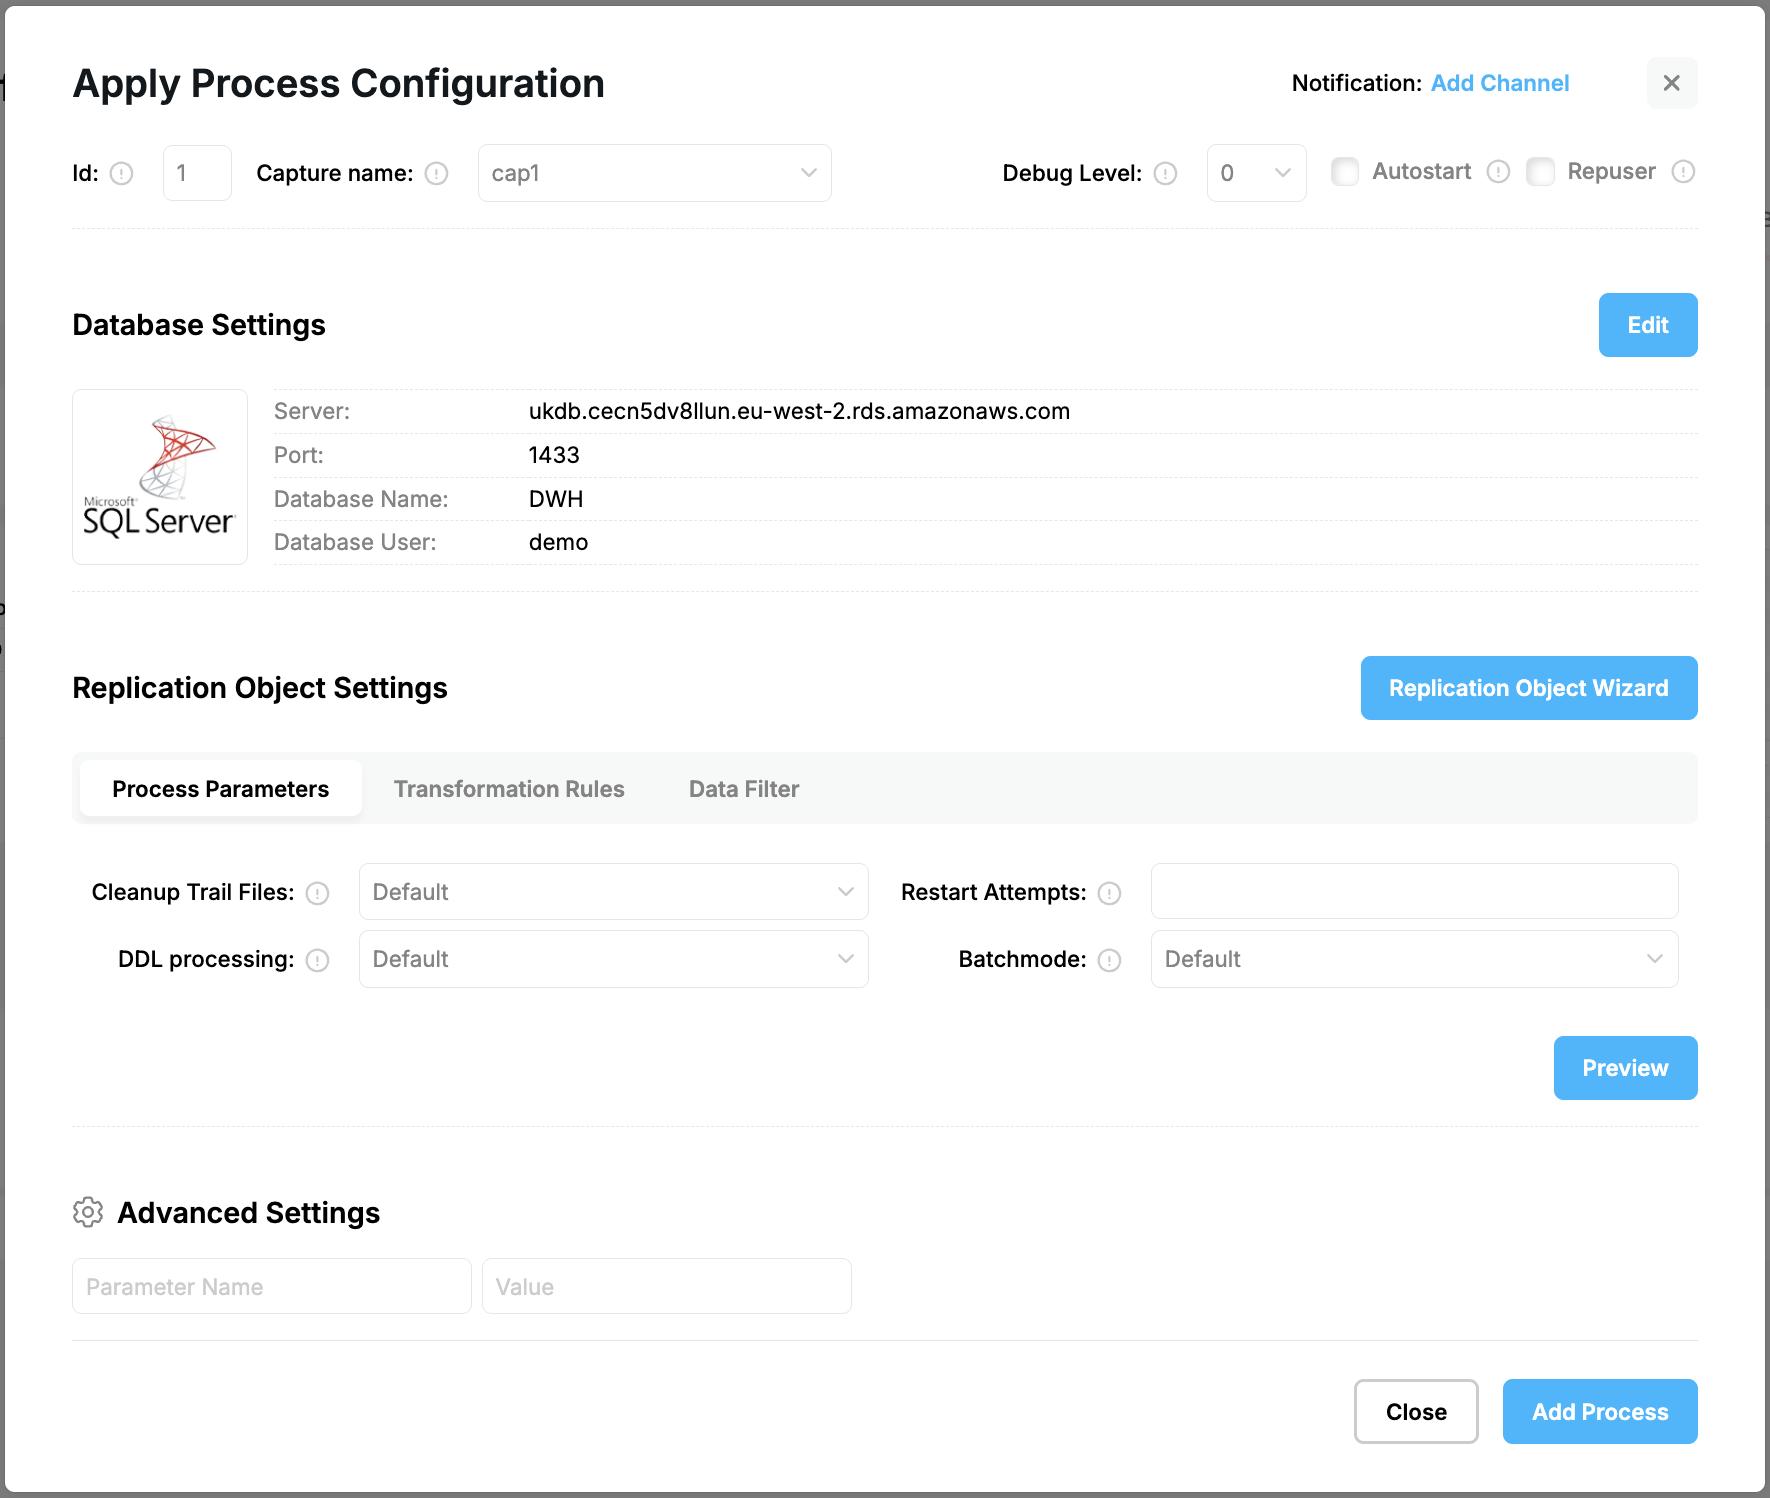
Click “Save” to proceed to the Capture Process Configuration:
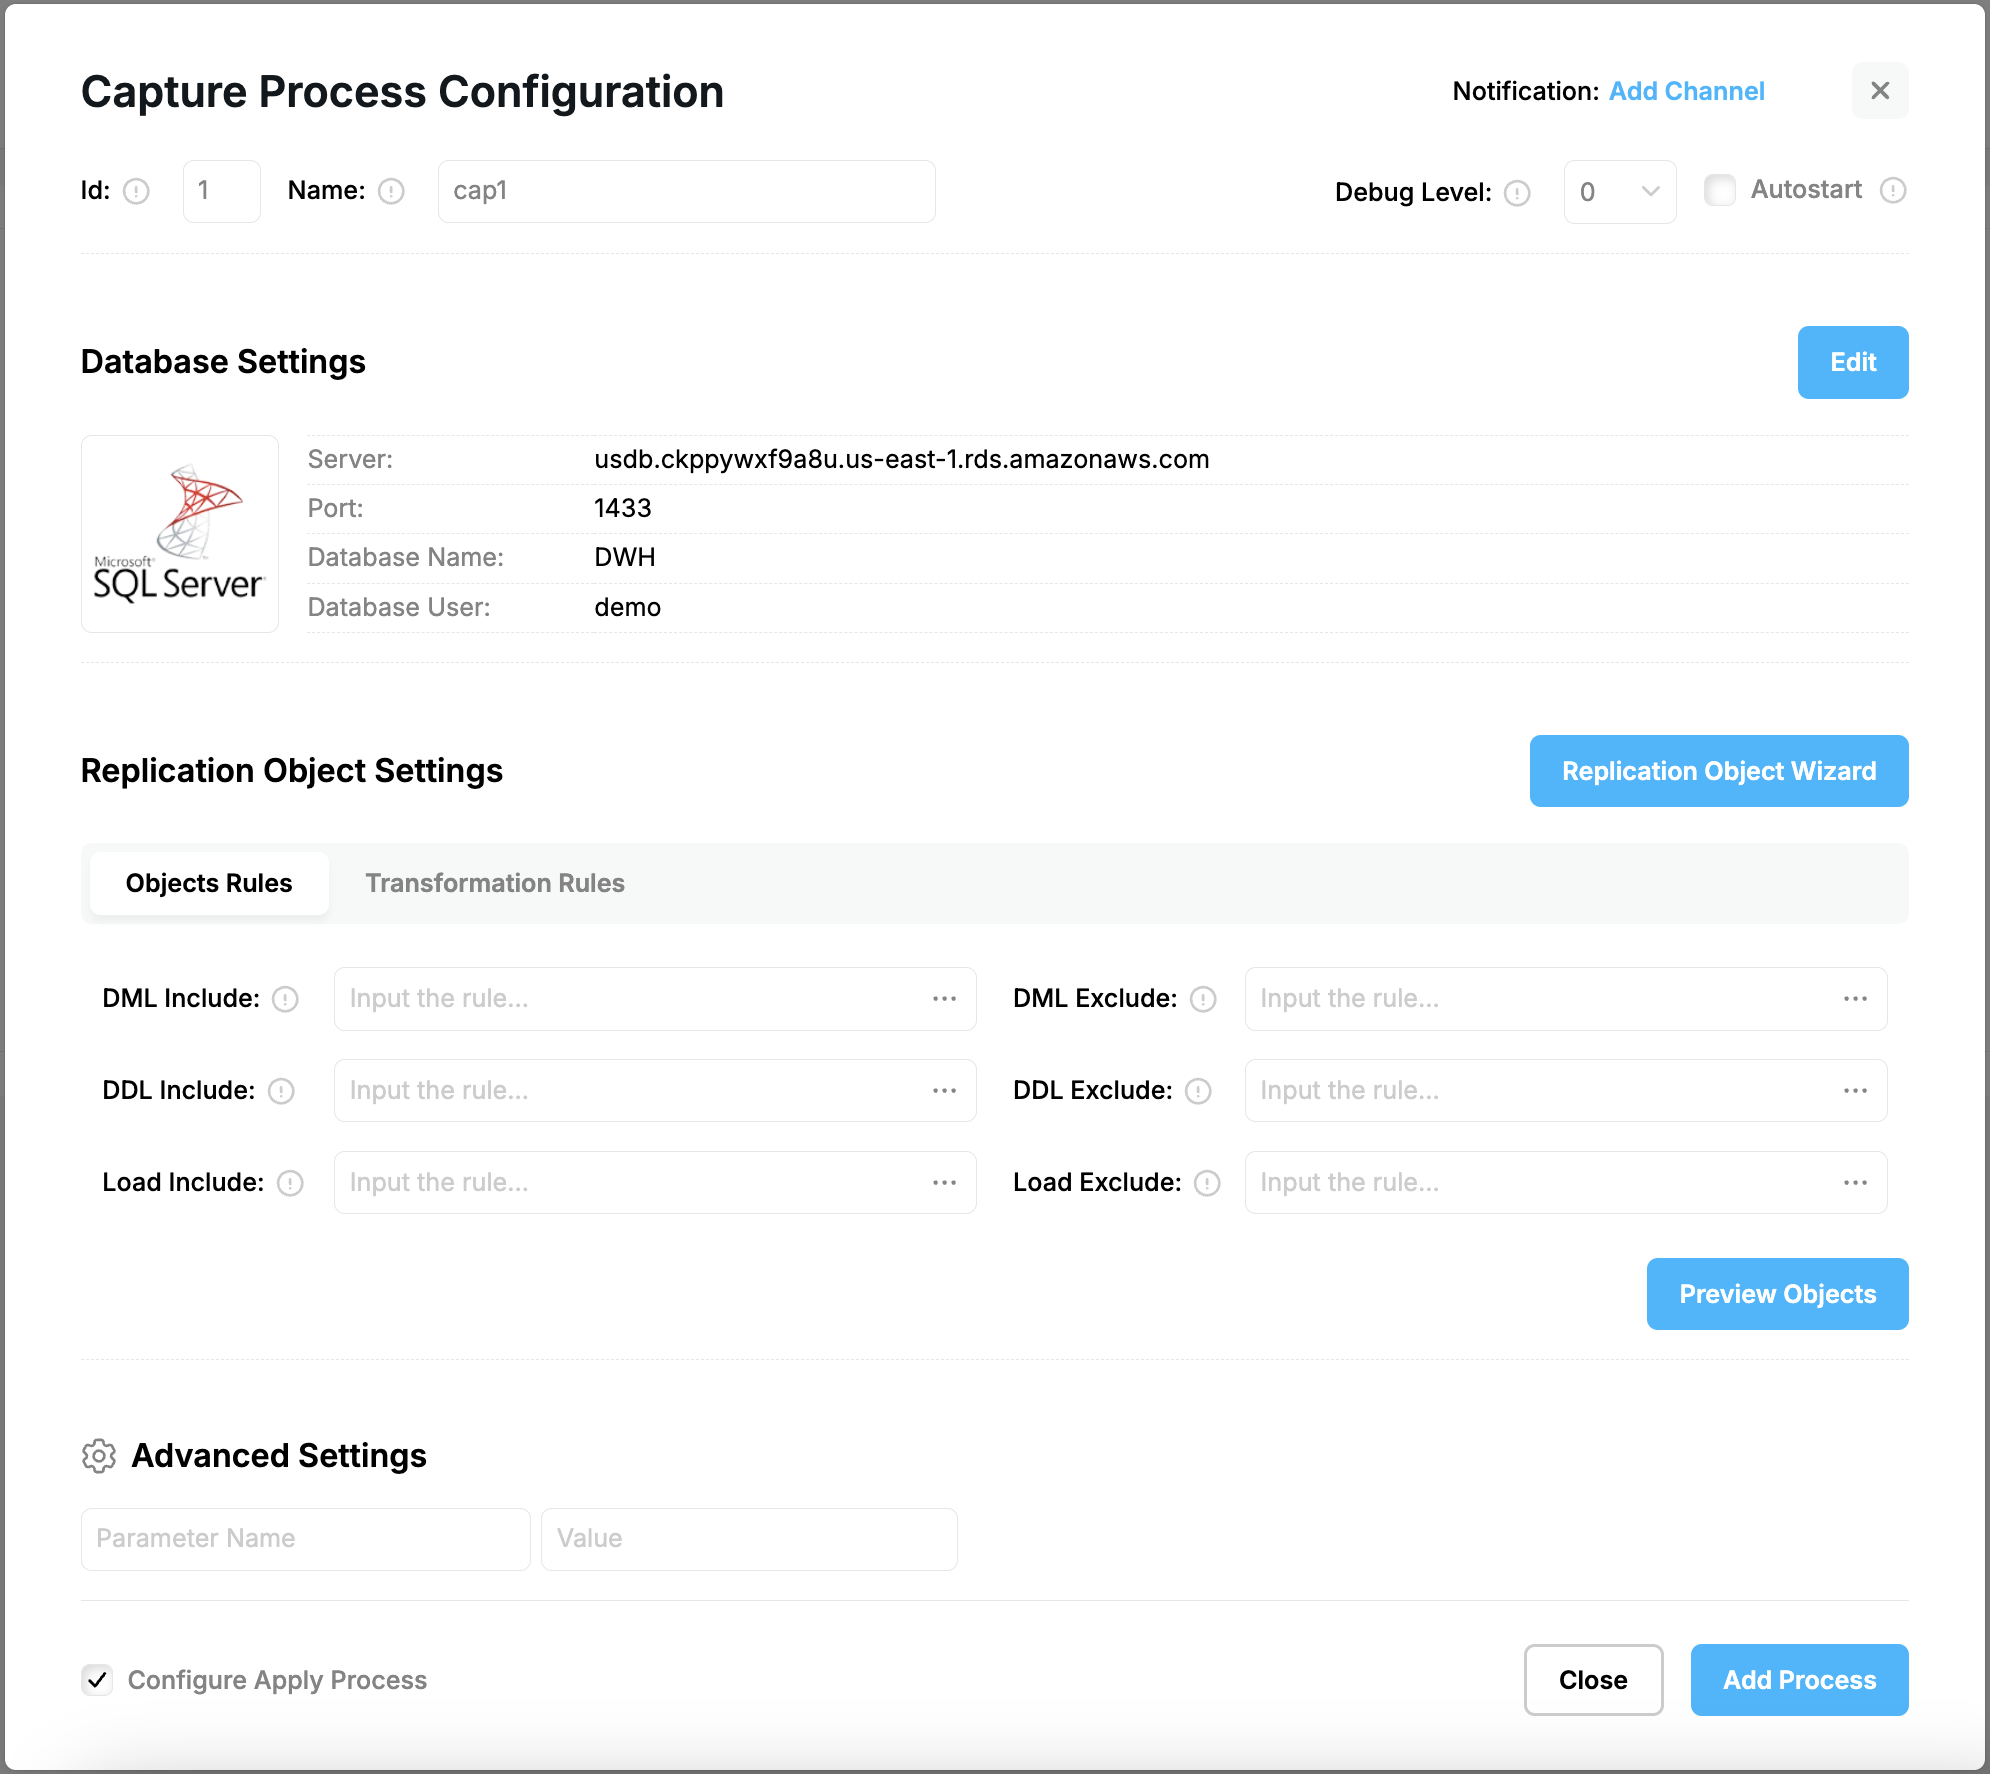
Replication objects are specified by DML, DDL and Load include parameters (see Capture Objects Specification). To simplify the configuration, Repstance provides a “Replication Object Wizard” editor for a visual representation. Click “Replication Object Wizard”:
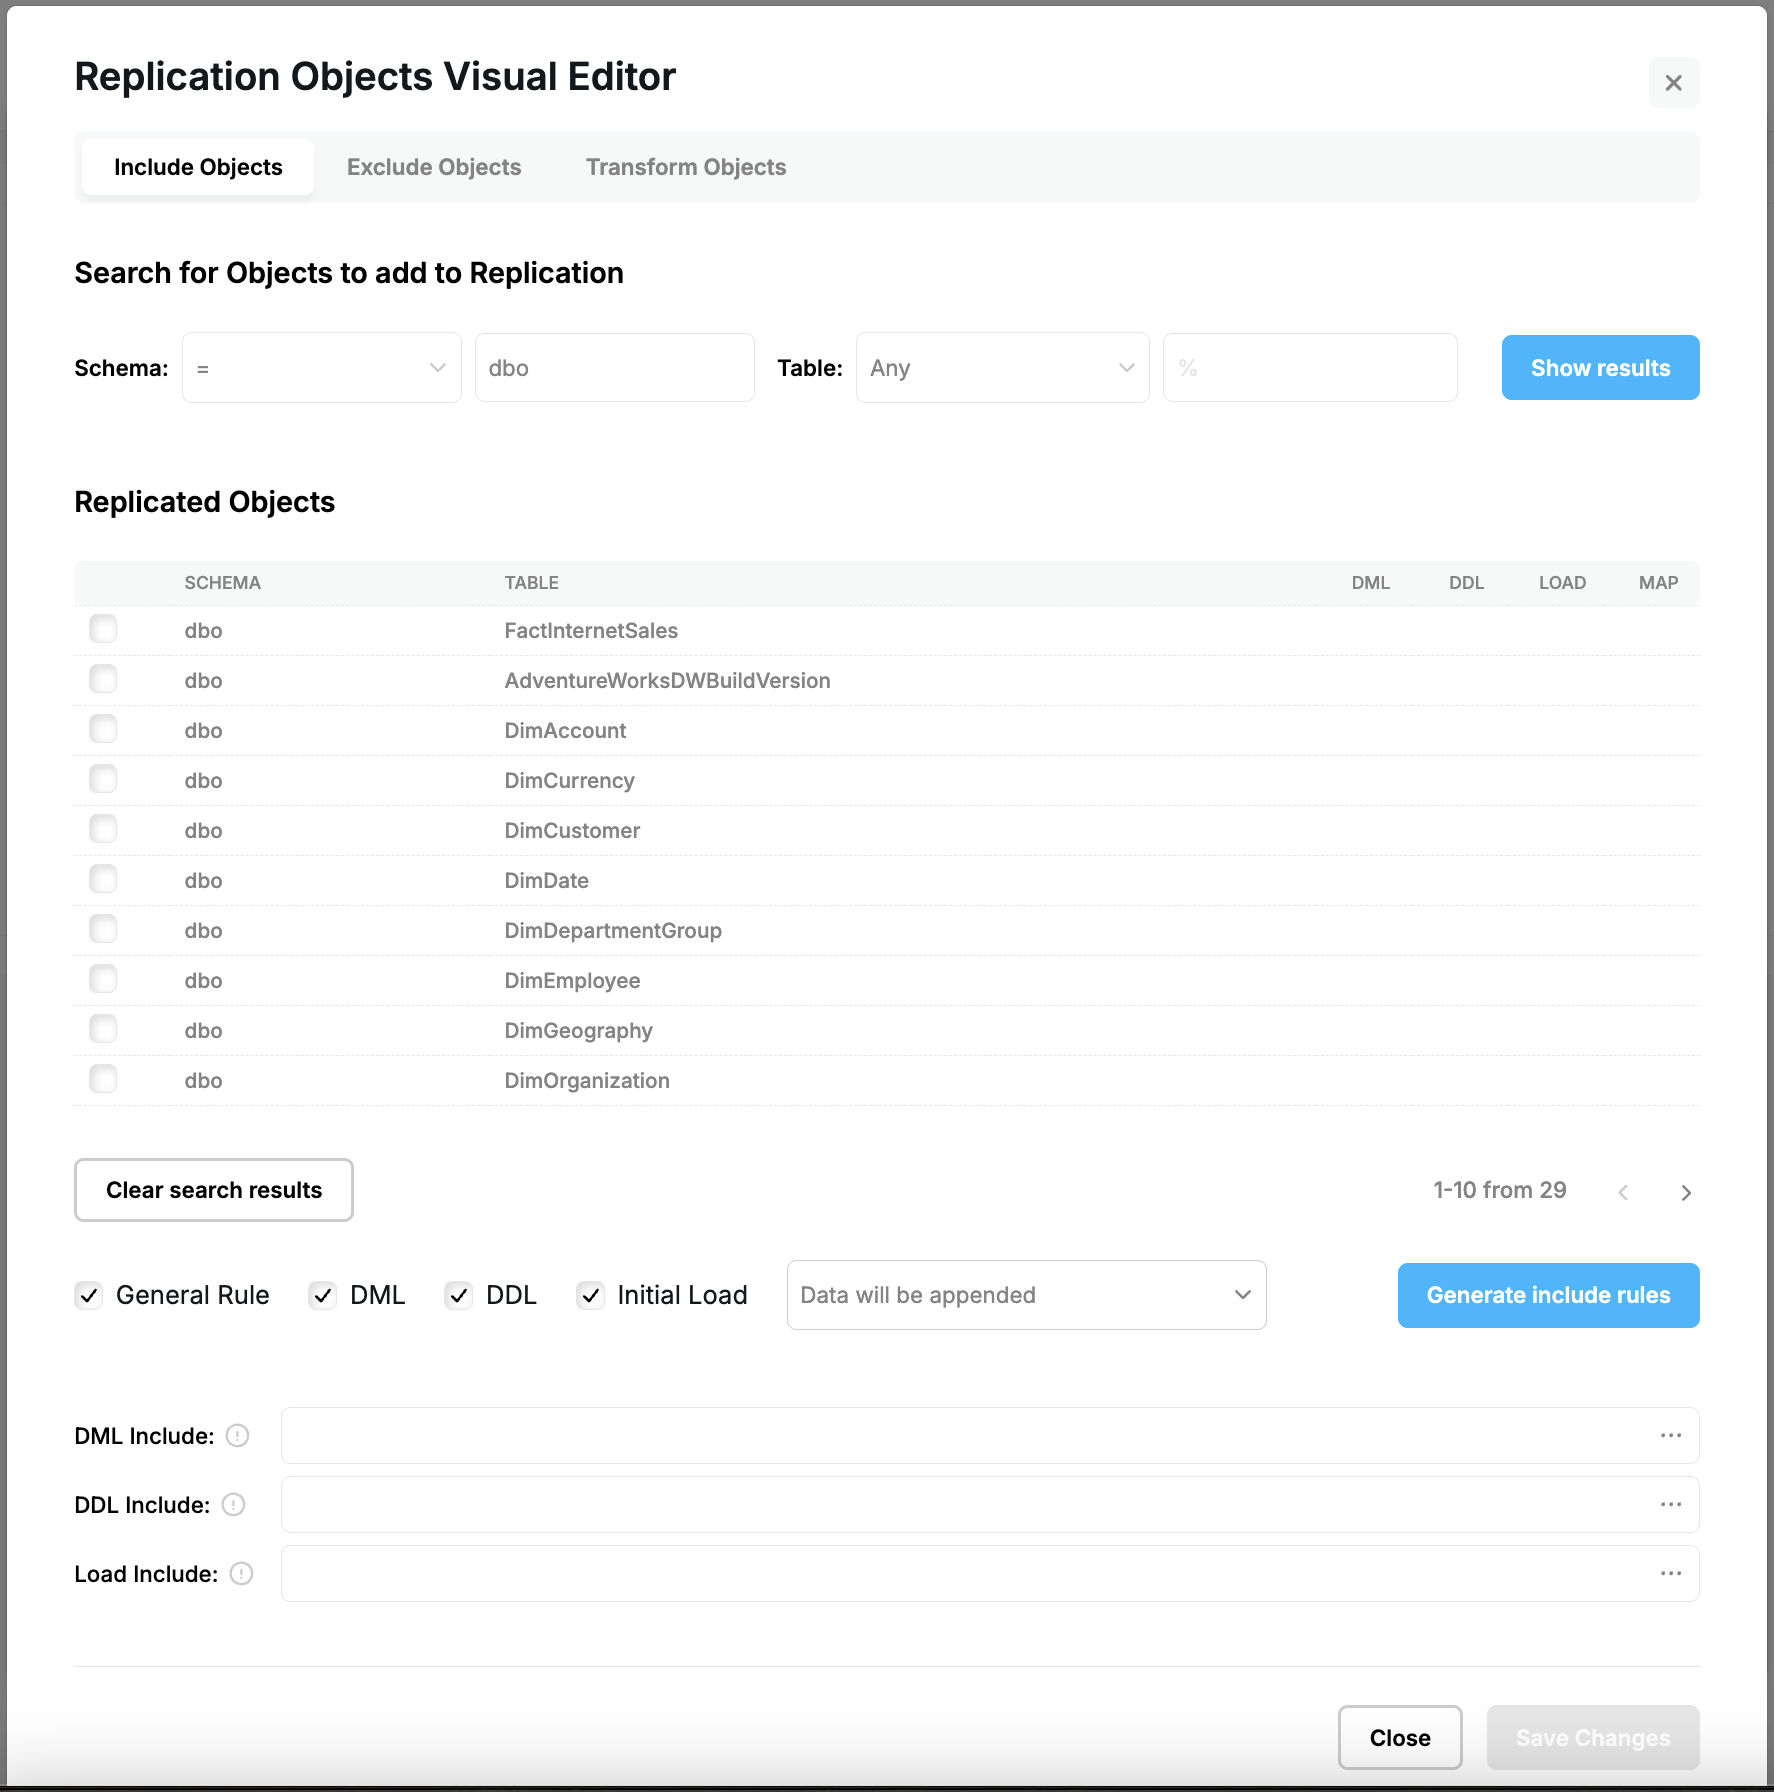
Specify the schema and tables that you want to include in replication and click “Show results” to see the objects. You can set general or individual rules on objects(including DML, DDL and Initial Load). Click “Generate include rules” to affect any further created objects:
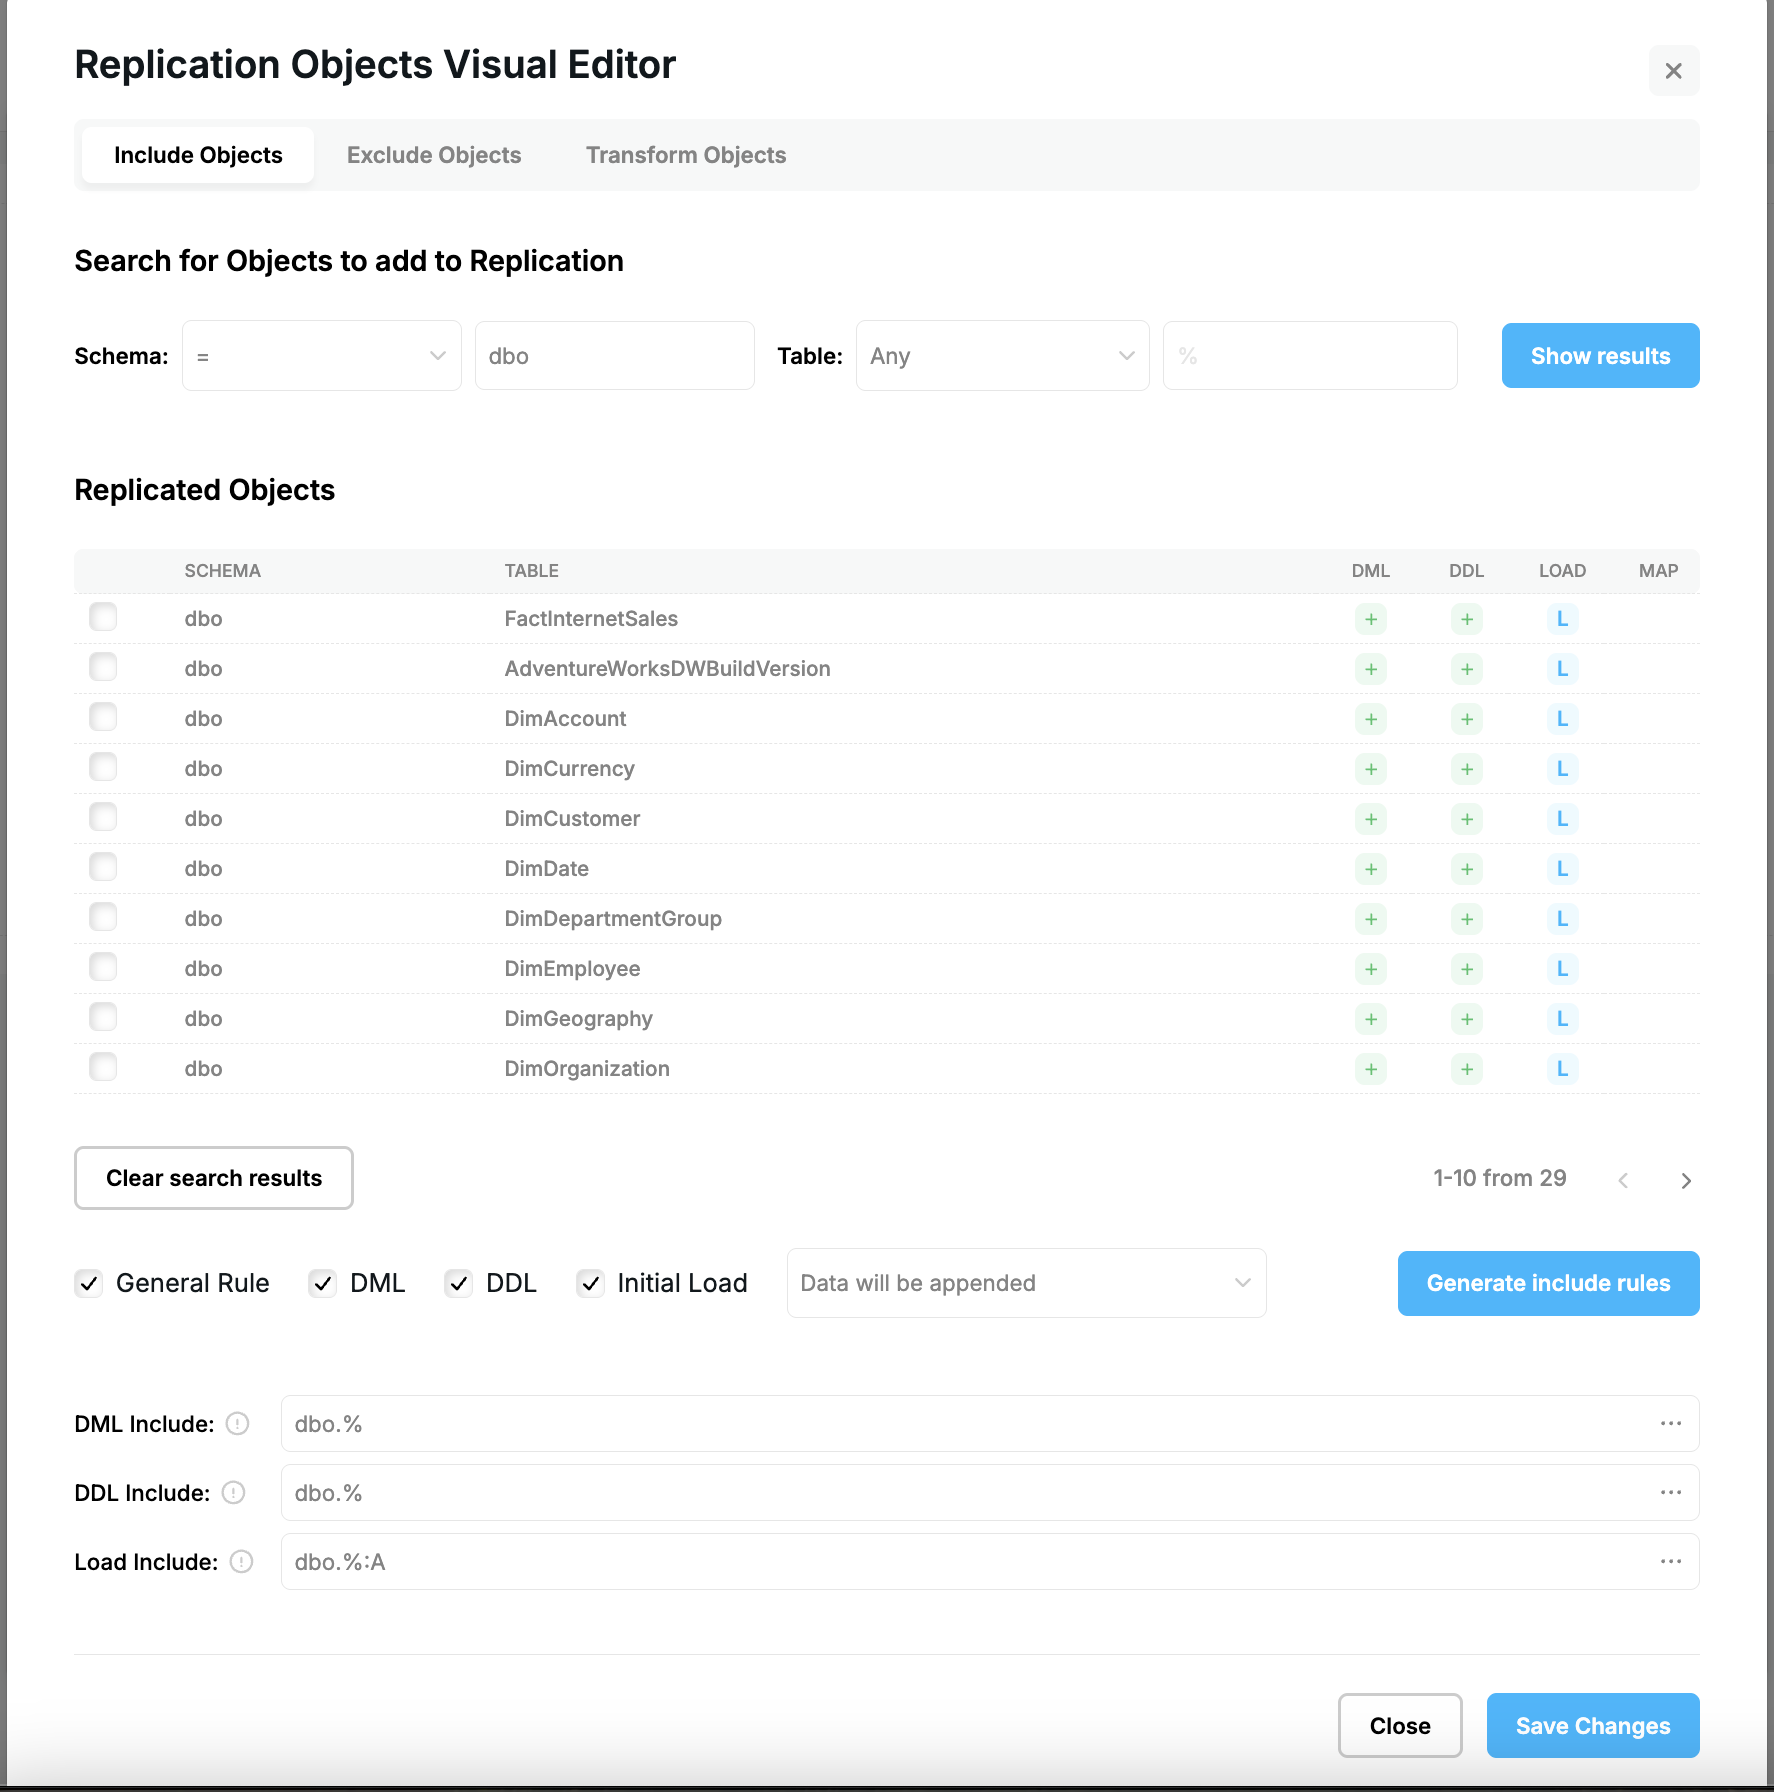
Click “Save changes” to save the replication rules:

Enable the flags “Autostart” in the right upper corner to run the process immediately after the creation and the “Configure Apply Process” if you wish to proceed to the Apply Process configuration right after the Capture process is completed.
Note: You can configure corresponding Apply Process or add more Apply Processes later by clicking “Add Apply” on a main dashboard page:

Clicking the “Add Process” button will create new Capture Process and proceed to the corresponding Apply Process configuration:
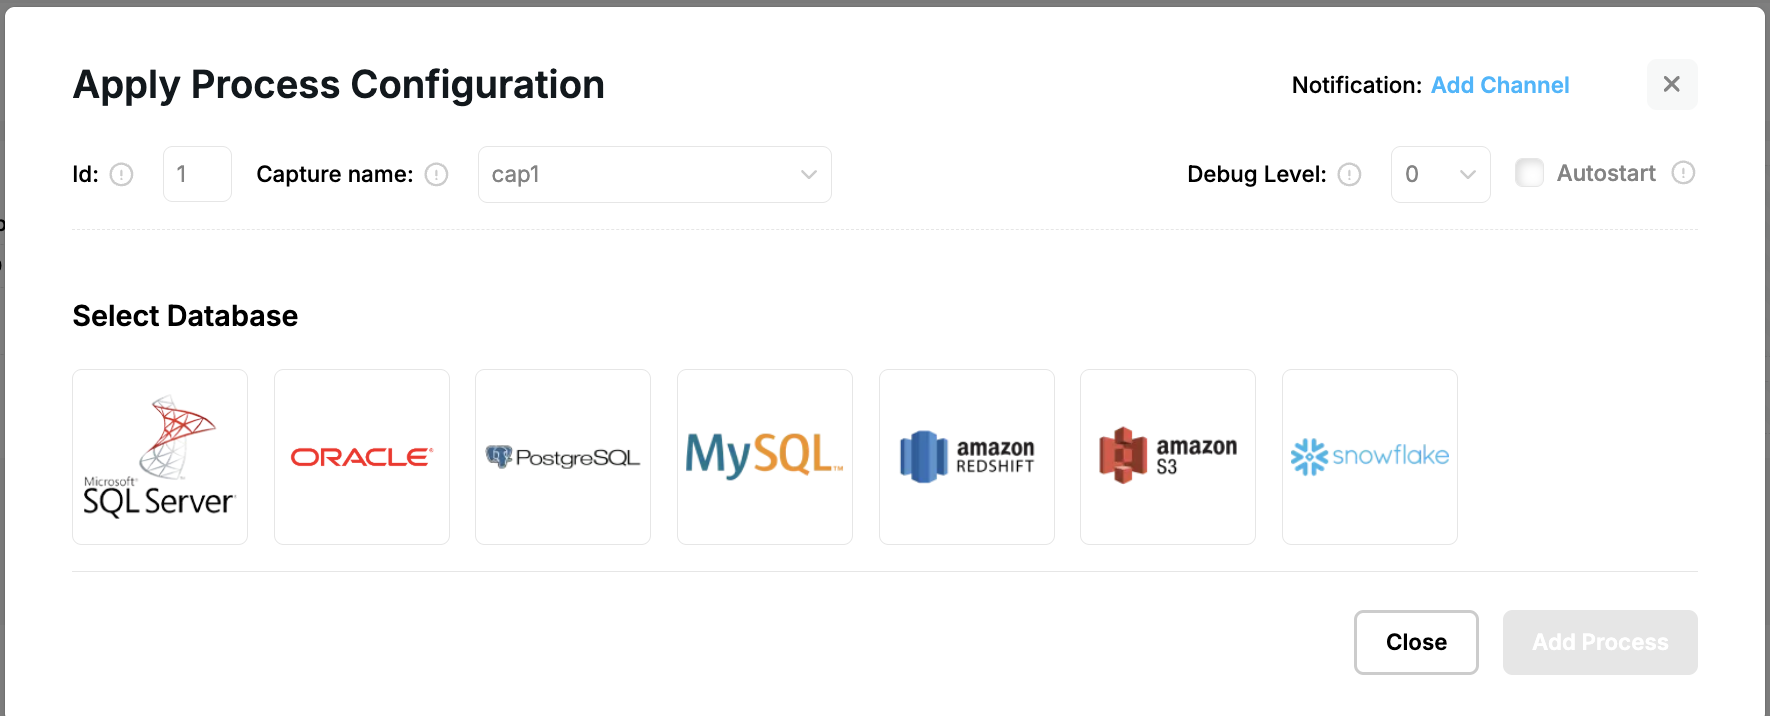
Provide Apply Process Id, and click the Target RDBMS type logo to open Target Database Settings form:
Provide database connectivity settings and click “Test connection” to verify the Target Database:
If the Target Database is not prepare for apply, click “Prepare for Replication” to install Repstance Apply's objects:
Click “Save” to proceed to the Apply Process Configuration:
Enable “Autostart” checkbox if you wish the Process to run automatically and Click “Add Process”.
The Replication is completed and you should see both Processes on a main dashboard:

Prev page:
REPSTANCE WEB USER INTERFACENext page:
Monitoring Replication- Repstance User Guide
- ABOUT REPSTANCE
- SUPPORTED DATABASE REQUIREMENTS
- GETTING STARTED WITH REPSTANCE
- INTERACTING WITH REPSTANCE SERVER
- CONFIGURE REPLICATION WITH REPSTANCE
- DATABASE CONFIGURATION COMMANDS
- PROCESS CONFIGURATION COMMANDS
- PROCESS CONTROL COMMANDS
- DATA COMPARISON
- REPSTANCE SERVER MAINTENANCE
- GLOSSARY